

[gelöst]CC2531 an proxmox an LXC durchreichen scheitert...
-
ich habe kein USV. Allerdings ist es doch so, dass nicht der Container, in dem der ioBroker läuft, mit dem USV kommunizieren muss, sondern Proxmox selbst, da Proxmox die VMs und LXC herunterfahren muss, wenn der Strom weg geht. Siehe die Diskussion in dem von mir verlinkten Beitrag im Proxmox-Forum.
ioBroker auf Intel NUC - Homematic CCU3/pivCCU auf Raspi 3B+
-
@wendy2702 sagte in [gelöst]CC2531 an proxmox an LXC durchreichen scheitert...:
Warum macht Ihr das nicht über den Proxmox WEBGUI?
Bin mir nicht sicher dich richtig zu verstehen, den USB zu einer VM durchzureichen = machbar über die Proxmox Oberfläche. Bei einem Container geht das meiner Meinung nach nicht.
-
@XxJooO Du hast vollkommen recht mit "dirket unter Proxmox", da traue ich mich aber nicht drüber.
@wendy2702 Dennoch lieben Dank für deine Rückmeldung.
Ich habs fürs Erste aufgegeben und den NUT Dienst lt. dieser Anleitung in der VM des ioBroker gemacht. USB durchgereicht und läuft auch schon im ioBroker Adapter. Jetzt muss ich mich mal mit den gelieferten Daten beschäftigen, aufs Erste habe ich noch keinen DP "wie lange tät die Batterie bei Netzausfall aushalten" gefunden.
LG, mxa -
ich habe kein USV. Allerdings ist es doch so, dass nicht der Container, in dem der ioBroker läuft, mit dem USV kommunizieren muss, sondern Proxmox selbst, da Proxmox die VMs und LXC herunterfahren muss, wenn der Strom weg geht. Siehe die Diskussion in dem von mir verlinkten Beitrag im Proxmox-Forum.
@XxJooO Danke für deine Anleitungen. Ich bekomme es nicht gebacken! Ich will nur einen Lesekopf für Smartmeter durchreichen...!
root@pve:~# lsusb
Bus 001 Device 002: ID 8087:8000 Intel Corp.
Bus 001 Device 001: ID 1d6b:0002 Linux Foundation 2.0 root hub
Bus 003 Device 001: ID 1d6b:0003 Linux Foundation 3.0 root hub
Bus 002 Device 005: ID 0403:6015 Future Technology Devices International, Ltd Bridge(I2C/SPI/UART/FIFO)
Bus 002 Device 001: ID 1d6b:0002 Linux Foundation 2.0 root hub
root@pve:~# ls -l /dev/tty* crw-rw-rw- 1 root tty 5, 0 Oct 5 00:19 /dev/tty crw--w---- 1 root tty 4, 0 Oct 4 00:59 /dev/tty0 crw--w---- 1 root tty 4, 1 Oct 4 00:59 /dev/tty1 crw--w---- 1 root tty 4, 10 Oct 4 00:59 /dev/tty10 crw--w---- 1 root tty 4, 11 Oct 4 00:59 /dev/tty11 crw--w---- 1 root tty 4, 12 Oct 4 00:59 /dev/tty12 crw--w---- 1 root tty 4, 13 Oct 4 00:59 /dev/tty13 crw--w---- 1 root tty 4, 14 Oct 4 00:59 /dev/tty14 crw--w---- 1 root tty 4, 15 Oct 4 00:59 /dev/tty15 crw--w---- 1 root tty 4, 16 Oct 4 00:59 /dev/tty16 crw--w---- 1 root tty 4, 17 Oct 4 00:59 /dev/tty17 crw--w---- 1 root tty 4, 18 Oct 4 00:59 /dev/tty18 crw--w---- 1 root tty 4, 19 Oct 4 00:59 /dev/tty19 crw--w---- 1 root tty 4, 2 Oct 4 00:59 /dev/tty2 crw--w---- 1 root tty 4, 20 Oct 4 00:59 /dev/tty20 crw--w---- 1 root tty 4, 21 Oct 4 00:59 /dev/tty21 crw--w---- 1 root tty 4, 22 Oct 4 00:59 /dev/tty22 crw--w---- 1 root tty 4, 23 Oct 4 00:59 /dev/tty23 crw--w---- 1 root tty 4, 24 Oct 4 00:59 /dev/tty24 crw--w---- 1 root tty 4, 25 Oct 4 00:59 /dev/tty25 crw--w---- 1 root tty 4, 26 Oct 4 00:59 /dev/tty26 crw--w---- 1 root tty 4, 27 Oct 4 00:59 /dev/tty27 crw--w---- 1 root tty 4, 28 Oct 4 00:59 /dev/tty28 crw--w---- 1 root tty 4, 29 Oct 4 00:59 /dev/tty29 crw--w---- 1 root tty 4, 3 Oct 4 00:59 /dev/tty3 crw--w---- 1 root tty 4, 30 Oct 4 00:59 /dev/tty30 crw--w---- 1 root tty 4, 31 Oct 4 00:59 /dev/tty31 crw--w---- 1 root tty 4, 32 Oct 4 00:59 /dev/tty32 crw--w---- 1 root tty 4, 33 Oct 4 00:59 /dev/tty33 crw--w---- 1 root tty 4, 34 Oct 4 00:59 /dev/tty34 crw--w---- 1 root tty 4, 35 Oct 4 00:59 /dev/tty35 crw--w---- 1 root tty 4, 36 Oct 4 00:59 /dev/tty36 crw--w---- 1 root tty 4, 37 Oct 4 00:59 /dev/tty37 crw--w---- 1 root tty 4, 38 Oct 4 00:59 /dev/tty38 crw--w---- 1 root tty 4, 39 Oct 4 00:59 /dev/tty39 crw--w---- 1 root tty 4, 4 Oct 4 00:59 /dev/tty4 crw--w---- 1 root tty 4, 40 Oct 4 00:59 /dev/tty40 crw--w---- 1 root tty 4, 41 Oct 4 00:59 /dev/tty41 crw--w---- 1 root tty 4, 42 Oct 4 00:59 /dev/tty42 crw--w---- 1 root tty 4, 43 Oct 4 00:59 /dev/tty43 crw--w---- 1 root tty 4, 44 Oct 4 00:59 /dev/tty44 crw--w---- 1 root tty 4, 45 Oct 4 00:59 /dev/tty45 crw--w---- 1 root tty 4, 46 Oct 4 00:59 /dev/tty46 crw--w---- 1 root tty 4, 47 Oct 4 00:59 /dev/tty47 crw--w---- 1 root tty 4, 48 Oct 4 00:59 /dev/tty48 crw--w---- 1 root tty 4, 49 Oct 4 00:59 /dev/tty49 crw--w---- 1 root tty 4, 5 Oct 4 00:59 /dev/tty5 crw--w---- 1 root tty 4, 50 Oct 4 00:59 /dev/tty50 crw--w---- 1 root tty 4, 51 Oct 4 00:59 /dev/tty51 crw--w---- 1 root tty 4, 52 Oct 4 00:59 /dev/tty52 crw--w---- 1 root tty 4, 53 Oct 4 00:59 /dev/tty53 crw--w---- 1 root tty 4, 54 Oct 4 00:59 /dev/tty54 crw--w---- 1 root tty 4, 55 Oct 4 00:59 /dev/tty55 crw--w---- 1 root tty 4, 56 Oct 4 00:59 /dev/tty56 crw--w---- 1 root tty 4, 57 Oct 4 00:59 /dev/tty57 crw--w---- 1 root tty 4, 58 Oct 4 00:59 /dev/tty58 crw--w---- 1 root tty 4, 59 Oct 4 00:59 /dev/tty59 crw--w---- 1 root tty 4, 6 Oct 4 00:59 /dev/tty6 crw--w---- 1 root tty 4, 60 Oct 4 00:59 /dev/tty60 crw--w---- 1 root tty 4, 61 Oct 4 00:59 /dev/tty61 crw--w---- 1 root tty 4, 62 Oct 4 00:59 /dev/tty62 crw--w---- 1 root tty 4, 63 Oct 4 00:59 /dev/tty63 crw--w---- 1 root tty 4, 7 Oct 4 00:59 /dev/tty7 crw--w---- 1 root tty 4, 8 Oct 4 00:59 /dev/tty8 crw--w---- 1 root tty 4, 9 Oct 4 00:59 /dev/tty9 crw------- 1 root root 5, 3 Oct 4 00:59 /dev/ttyprintk crw-rw---- 1 root dialout 4, 64 Oct 4 00:59 /dev/ttyS0 crw-rw---- 1 root dialout 4, 65 Oct 4 00:59 /dev/ttyS1 crw-rw---- 1 root dialout 4, 74 Oct 4 00:59 /dev/ttyS10 crw-rw---- 1 root dialout 4, 75 Oct 4 00:59 /dev/ttyS11 crw-rw---- 1 root dialout 4, 76 Oct 4 00:59 /dev/ttyS12 crw-rw---- 1 root dialout 4, 77 Oct 4 00:59 /dev/ttyS13 crw-rw---- 1 root dialout 4, 78 Oct 4 00:59 /dev/ttyS14 crw-rw---- 1 root dialout 4, 79 Oct 4 00:59 /dev/ttyS15 crw-rw---- 1 root dialout 4, 80 Oct 4 00:59 /dev/ttyS16 crw-rw---- 1 root dialout 4, 81 Oct 4 00:59 /dev/ttyS17 crw-rw---- 1 root dialout 4, 82 Oct 4 00:59 /dev/ttyS18 crw-rw---- 1 root dialout 4, 83 Oct 4 00:59 /dev/ttyS19 crw-rw---- 1 root dialout 4, 66 Oct 4 00:59 /dev/ttyS2 crw-rw---- 1 root dialout 4, 84 Oct 4 00:59 /dev/ttyS20 crw-rw---- 1 root dialout 4, 85 Oct 4 00:59 /dev/ttyS21 crw-rw---- 1 root dialout 4, 86 Oct 4 00:59 /dev/ttyS22 crw-rw---- 1 root dialout 4, 87 Oct 4 00:59 /dev/ttyS23 crw-rw---- 1 root dialout 4, 88 Oct 4 00:59 /dev/ttyS24 crw-rw---- 1 root dialout 4, 89 Oct 4 00:59 /dev/ttyS25 crw-rw---- 1 root dialout 4, 90 Oct 4 00:59 /dev/ttyS26 crw-rw---- 1 root dialout 4, 91 Oct 4 00:59 /dev/ttyS27 crw-rw---- 1 root dialout 4, 92 Oct 4 00:59 /dev/ttyS28 crw-rw---- 1 root dialout 4, 93 Oct 4 00:59 /dev/ttyS29 crw-rw---- 1 root dialout 4, 67 Oct 4 00:59 /dev/ttyS3 crw-rw---- 1 root dialout 4, 94 Oct 4 00:59 /dev/ttyS30 crw-rw---- 1 root dialout 4, 95 Oct 4 00:59 /dev/ttyS31 crw-rw---- 1 root dialout 4, 68 Oct 4 00:59 /dev/ttyS4 crw-rw---- 1 root dialout 4, 69 Oct 4 00:59 /dev/ttyS5 crw-rw---- 1 root dialout 4, 70 Oct 4 00:59 /dev/ttyS6 crw-rw---- 1 root dialout 4, 71 Oct 4 00:59 /dev/ttyS7 crw-rw---- 1 root dialout 4, 72 Oct 4 00:59 /dev/ttyS8 crw-rw---- 1 root dialout 4, 73 Oct 4 00:59 /dev/ttyS9 crw-rw-rw- 1 root dialout 188, 0 Oct 5 23:13 /dev/ttyUSB0root@pve:~# ls -l /dev/bus/usb/002/005 crw-rw-r-- 1 root root 189, 132 Oct 5 23:13 /dev/bus/usb/002/005arch: amd64 cores: 2 hostname: iobroker memory: 3072 net0: name=eth0,bridge=vmbr0,firewall=1,hwaddr=7A:8D:76:2A:03:3B,ip=dhcp,ip6=auto,type=veth onboot: 1 ostype: debian rootfs: local-lvm:vm-101-disk-0,size=15G swap: 512 lxc.cgroup.devices.allow: c 189:* rwm lxc.mount.entry: /dev/bus/usb/002/005 dev/bus/usb/002/005 none bind,optional,create=file lxc.cgroup.devices.allow: c 189:* rwm lxc.mount.entry: /dev/ttyUSB0 /dev/ttyUSB0 none bind,optional,create=fileroot@pve:~# chmod o+rw /dev/ttyUSB0 -
@XxJooO Danke für deine Anleitungen. Ich bekomme es nicht gebacken! Ich will nur einen Lesekopf für Smartmeter durchreichen...!
root@pve:~# lsusb Bus 001 Device 002: ID 8087:8000 Intel Corp. Bus 001 Device 001: ID 1d6b:0002 Linux Foundation 2.0 root hub Bus 003 Device 001: ID 1d6b:0003 Linux Foundation 3.0 root hub Bus 002 Device 005: ID 0403:6015 Future Technology Devices International, Ltd Bridge(I2C/SPI/UART/FIFO) Bus 002 Device 001: ID 1d6b:0002 Linux Foundation 2.0 root hubroot@pve:~# ls -l /dev/tty* crw-rw-rw- 1 root tty 5, 0 Oct 5 00:19 /dev/tty crw--w---- 1 root tty 4, 0 Oct 4 00:59 /dev/tty0 crw--w---- 1 root tty 4, 1 Oct 4 00:59 /dev/tty1 crw--w---- 1 root tty 4, 10 Oct 4 00:59 /dev/tty10 crw--w---- 1 root tty 4, 11 Oct 4 00:59 /dev/tty11 crw--w---- 1 root tty 4, 12 Oct 4 00:59 /dev/tty12 crw--w---- 1 root tty 4, 13 Oct 4 00:59 /dev/tty13 crw--w---- 1 root tty 4, 14 Oct 4 00:59 /dev/tty14 crw--w---- 1 root tty 4, 15 Oct 4 00:59 /dev/tty15 crw--w---- 1 root tty 4, 16 Oct 4 00:59 /dev/tty16 crw--w---- 1 root tty 4, 17 Oct 4 00:59 /dev/tty17 crw--w---- 1 root tty 4, 18 Oct 4 00:59 /dev/tty18 crw--w---- 1 root tty 4, 19 Oct 4 00:59 /dev/tty19 crw--w---- 1 root tty 4, 2 Oct 4 00:59 /dev/tty2 crw--w---- 1 root tty 4, 20 Oct 4 00:59 /dev/tty20 crw--w---- 1 root tty 4, 21 Oct 4 00:59 /dev/tty21 crw--w---- 1 root tty 4, 22 Oct 4 00:59 /dev/tty22 crw--w---- 1 root tty 4, 23 Oct 4 00:59 /dev/tty23 crw--w---- 1 root tty 4, 24 Oct 4 00:59 /dev/tty24 crw--w---- 1 root tty 4, 25 Oct 4 00:59 /dev/tty25 crw--w---- 1 root tty 4, 26 Oct 4 00:59 /dev/tty26 crw--w---- 1 root tty 4, 27 Oct 4 00:59 /dev/tty27 crw--w---- 1 root tty 4, 28 Oct 4 00:59 /dev/tty28 crw--w---- 1 root tty 4, 29 Oct 4 00:59 /dev/tty29 crw--w---- 1 root tty 4, 3 Oct 4 00:59 /dev/tty3 crw--w---- 1 root tty 4, 30 Oct 4 00:59 /dev/tty30 crw--w---- 1 root tty 4, 31 Oct 4 00:59 /dev/tty31 crw--w---- 1 root tty 4, 32 Oct 4 00:59 /dev/tty32 crw--w---- 1 root tty 4, 33 Oct 4 00:59 /dev/tty33 crw--w---- 1 root tty 4, 34 Oct 4 00:59 /dev/tty34 crw--w---- 1 root tty 4, 35 Oct 4 00:59 /dev/tty35 crw--w---- 1 root tty 4, 36 Oct 4 00:59 /dev/tty36 crw--w---- 1 root tty 4, 37 Oct 4 00:59 /dev/tty37 crw--w---- 1 root tty 4, 38 Oct 4 00:59 /dev/tty38 crw--w---- 1 root tty 4, 39 Oct 4 00:59 /dev/tty39 crw--w---- 1 root tty 4, 4 Oct 4 00:59 /dev/tty4 crw--w---- 1 root tty 4, 40 Oct 4 00:59 /dev/tty40 crw--w---- 1 root tty 4, 41 Oct 4 00:59 /dev/tty41 crw--w---- 1 root tty 4, 42 Oct 4 00:59 /dev/tty42 crw--w---- 1 root tty 4, 43 Oct 4 00:59 /dev/tty43 crw--w---- 1 root tty 4, 44 Oct 4 00:59 /dev/tty44 crw--w---- 1 root tty 4, 45 Oct 4 00:59 /dev/tty45 crw--w---- 1 root tty 4, 46 Oct 4 00:59 /dev/tty46 crw--w---- 1 root tty 4, 47 Oct 4 00:59 /dev/tty47 crw--w---- 1 root tty 4, 48 Oct 4 00:59 /dev/tty48 crw--w---- 1 root tty 4, 49 Oct 4 00:59 /dev/tty49 crw--w---- 1 root tty 4, 5 Oct 4 00:59 /dev/tty5 crw--w---- 1 root tty 4, 50 Oct 4 00:59 /dev/tty50 crw--w---- 1 root tty 4, 51 Oct 4 00:59 /dev/tty51 crw--w---- 1 root tty 4, 52 Oct 4 00:59 /dev/tty52 crw--w---- 1 root tty 4, 53 Oct 4 00:59 /dev/tty53 crw--w---- 1 root tty 4, 54 Oct 4 00:59 /dev/tty54 crw--w---- 1 root tty 4, 55 Oct 4 00:59 /dev/tty55 crw--w---- 1 root tty 4, 56 Oct 4 00:59 /dev/tty56 crw--w---- 1 root tty 4, 57 Oct 4 00:59 /dev/tty57 crw--w---- 1 root tty 4, 58 Oct 4 00:59 /dev/tty58 crw--w---- 1 root tty 4, 59 Oct 4 00:59 /dev/tty59 crw--w---- 1 root tty 4, 6 Oct 4 00:59 /dev/tty6 crw--w---- 1 root tty 4, 60 Oct 4 00:59 /dev/tty60 crw--w---- 1 root tty 4, 61 Oct 4 00:59 /dev/tty61 crw--w---- 1 root tty 4, 62 Oct 4 00:59 /dev/tty62 crw--w---- 1 root tty 4, 63 Oct 4 00:59 /dev/tty63 crw--w---- 1 root tty 4, 7 Oct 4 00:59 /dev/tty7 crw--w---- 1 root tty 4, 8 Oct 4 00:59 /dev/tty8 crw--w---- 1 root tty 4, 9 Oct 4 00:59 /dev/tty9 crw------- 1 root root 5, 3 Oct 4 00:59 /dev/ttyprintk crw-rw---- 1 root dialout 4, 64 Oct 4 00:59 /dev/ttyS0 crw-rw---- 1 root dialout 4, 65 Oct 4 00:59 /dev/ttyS1 crw-rw---- 1 root dialout 4, 74 Oct 4 00:59 /dev/ttyS10 crw-rw---- 1 root dialout 4, 75 Oct 4 00:59 /dev/ttyS11 crw-rw---- 1 root dialout 4, 76 Oct 4 00:59 /dev/ttyS12 crw-rw---- 1 root dialout 4, 77 Oct 4 00:59 /dev/ttyS13 crw-rw---- 1 root dialout 4, 78 Oct 4 00:59 /dev/ttyS14 crw-rw---- 1 root dialout 4, 79 Oct 4 00:59 /dev/ttyS15 crw-rw---- 1 root dialout 4, 80 Oct 4 00:59 /dev/ttyS16 crw-rw---- 1 root dialout 4, 81 Oct 4 00:59 /dev/ttyS17 crw-rw---- 1 root dialout 4, 82 Oct 4 00:59 /dev/ttyS18 crw-rw---- 1 root dialout 4, 83 Oct 4 00:59 /dev/ttyS19 crw-rw---- 1 root dialout 4, 66 Oct 4 00:59 /dev/ttyS2 crw-rw---- 1 root dialout 4, 84 Oct 4 00:59 /dev/ttyS20 crw-rw---- 1 root dialout 4, 85 Oct 4 00:59 /dev/ttyS21 crw-rw---- 1 root dialout 4, 86 Oct 4 00:59 /dev/ttyS22 crw-rw---- 1 root dialout 4, 87 Oct 4 00:59 /dev/ttyS23 crw-rw---- 1 root dialout 4, 88 Oct 4 00:59 /dev/ttyS24 crw-rw---- 1 root dialout 4, 89 Oct 4 00:59 /dev/ttyS25 crw-rw---- 1 root dialout 4, 90 Oct 4 00:59 /dev/ttyS26 crw-rw---- 1 root dialout 4, 91 Oct 4 00:59 /dev/ttyS27 crw-rw---- 1 root dialout 4, 92 Oct 4 00:59 /dev/ttyS28 crw-rw---- 1 root dialout 4, 93 Oct 4 00:59 /dev/ttyS29 crw-rw---- 1 root dialout 4, 67 Oct 4 00:59 /dev/ttyS3 crw-rw---- 1 root dialout 4, 94 Oct 4 00:59 /dev/ttyS30 crw-rw---- 1 root dialout 4, 95 Oct 4 00:59 /dev/ttyS31 crw-rw---- 1 root dialout 4, 68 Oct 4 00:59 /dev/ttyS4 crw-rw---- 1 root dialout 4, 69 Oct 4 00:59 /dev/ttyS5 crw-rw---- 1 root dialout 4, 70 Oct 4 00:59 /dev/ttyS6 crw-rw---- 1 root dialout 4, 71 Oct 4 00:59 /dev/ttyS7 crw-rw---- 1 root dialout 4, 72 Oct 4 00:59 /dev/ttyS8 crw-rw---- 1 root dialout 4, 73 Oct 4 00:59 /dev/ttyS9 crw-rw-rw- 1 root dialout 188, 0 Oct 5 23:13 /dev/ttyUSB0root@pve:~# ls -l /dev/bus/usb/002/005 crw-rw-r-- 1 root root 189, 132 Oct 5 23:13 /dev/bus/usb/002/005arch: amd64 cores: 2 hostname: iobroker memory: 3072 net0: name=eth0,bridge=vmbr0,firewall=1,hwaddr=7A:8D:76:2A:03:3B,ip=dhcp,ip6=auto,type=veth onboot: 1 ostype: debian rootfs: local-lvm:vm-101-disk-0,size=15G swap: 512 lxc.cgroup.devices.allow: c 189:* rwm lxc.mount.entry: /dev/bus/usb/002/005 dev/bus/usb/002/005 none bind,optional,create=file lxc.cgroup.devices.allow: c 189:* rwm lxc.mount.entry: /dev/ttyUSB0 /dev/ttyUSB0 none bind,optional,create=fileroot@pve:~# chmod o+rw /dev/ttyUSB0Ich antworte mir mal selber...das hier gefunden und es funzt:
https://forum.proxmox.com/threads/werde-wahnsinnig-lxc-passthough.56632/Meine Config sieht nun so aus...Muss das nochmal anpassen. Entweder versehetlich die 188 mit der 189 verwechselt oder die Zeile 15 hats gebracht.
arch: amd64 cores: 2 hostname: iobroker memory: 3072 net0: name=eth0,bridge=vmbr0,firewall=1,hwaddr=7A:8D:76:2A:03:3B,ip=dhcp,ip6=auto,type=veth onboot: 1 ostype: debian rootfs: local-lvm:vm-101-disk-0,size=15G swap: 512 lxc.cgroup.devices.allow: c 189:* rwm lxc.mount.entry: /dev/bus/usb/002/005 dev/bus/usb/002/005 none bind,optional,create=file lxc.cgroup.devices.allow: c 189:* rwm lxc.mount.entry: /dev/ttyUSB0 /dev/ttyUSB0 none bind,optional,create=file lxc.cgroup.devices.allow: c 188:* rwm lxc.cgroup.devices.allow: c 10:200 rwm lxc.mount.entry: /dev/ttyUSB0 dev/ttyUSB0 none bind,optional,create=file -
Ich antworte mir mal selber...das hier gefunden und es funzt:
https://forum.proxmox.com/threads/werde-wahnsinnig-lxc-passthough.56632/Meine Config sieht nun so aus...Muss das nochmal anpassen. Entweder versehetlich die 188 mit der 189 verwechselt oder die Zeile 15 hats gebracht.
arch: amd64 cores: 2 hostname: iobroker memory: 3072 net0: name=eth0,bridge=vmbr0,firewall=1,hwaddr=7A:8D:76:2A:03:3B,ip=dhcp,ip6=auto,type=veth onboot: 1 ostype: debian rootfs: local-lvm:vm-101-disk-0,size=15G swap: 512 lxc.cgroup.devices.allow: c 189:* rwm lxc.mount.entry: /dev/bus/usb/002/005 dev/bus/usb/002/005 none bind,optional,create=file lxc.cgroup.devices.allow: c 189:* rwm lxc.mount.entry: /dev/ttyUSB0 /dev/ttyUSB0 none bind,optional,create=file lxc.cgroup.devices.allow: c 188:* rwm lxc.cgroup.devices.allow: c 10:200 rwm lxc.mount.entry: /dev/ttyUSB0 dev/ttyUSB0 none bind,optional,create=file@oberfragger würde lieber dev/serial/by-id durchreichen, im Falles eines reboots sicherer.
lxc.mount.entry: /dev/serial/by-id/xxx dev/serial/by-id/xxx none bind,optional,create=file chmod o+rw /dev/serial/by-id/xxx -
@oberfragger würde lieber dev/serial/by-id durchreichen, im Falles eines reboots sicherer.
lxc.mount.entry: /dev/serial/by-id/xxx dev/serial/by-id/xxx none bind,optional,create=file chmod o+rw /dev/serial/by-id/xxx@Malz1902 Danke für den Hinweis. Meinst den den reboot des gesamten Hosts oder der VM? Ansonsten- kannst du mir das am meinem Beispiel bitte konkretisieren?
Serial lasse ich warscheinlich so drin stehen, by-id auch... was mus aber bei xxx stehen bzw. wie ermittel ich das?und welche zeile ist "richtiger"?
lxc.mount.entry: /dev/ttyUSB0 /dev/ttyUSB0 none bind,optional,create=file
lxc.mount.entry: /dev/ttyUSB0 dev/ttyUSB0 none bind,optional,create=file
Zeile 1, oder?
-
@Malz1902 Danke für den Hinweis. Meinst den den reboot des gesamten Hosts oder der VM? Ansonsten- kannst du mir das am meinem Beispiel bitte konkretisieren?
Serial lasse ich warscheinlich so drin stehen, by-id auch... was mus aber bei xxx stehen bzw. wie ermittel ich das?und welche zeile ist "richtiger"?
lxc.mount.entry: /dev/ttyUSB0 /dev/ttyUSB0 none bind,optional,create=file
lxc.mount.entry: /dev/ttyUSB0 dev/ttyUSB0 none bind,optional,create=file
Zeile 1, oder?
-
@oberfragger Zeile 1 ist richtig.
Mach mal auf edm Host
ls -la /dev/serial/by-iddann bekommst du ne Liste Deinen USB Geräte
XXX ersetzt Du dann mit Deinem USB Gerät@Malz1902 said in [gelöst]CC2531 an proxmox an LXC durchreichen scheitert...:
mit Deinem US
Sorry dass ich fragen muss. Aber was ist jetzt die ID/xxx?
root@pve:~# ls -la /dev/serial/by-id
total 0
drwxr-xr-x 2 root root 60 Oct  5 23:13 .
drwxr-xr-x 4 root root 80 Oct  5 23:13 ..
lrwxrwxrwx 1 root root 13 Oct  5 23:13 usb-FTDI_FT230X_Basic_UART_D306QJU0-if00-port0 -> ../../ttyUSB0
usb-FTDI_FT230X_Basic_UART_D306QJU0-if00-port0 ?
-
@oberfragger würde lieber dev/serial/by-id durchreichen, im Falles eines reboots sicherer.
lxc.mount.entry: /dev/serial/by-id/xxx dev/serial/by-id/xxx none bind,optional,create=file chmod o+rw /dev/serial/by-id/xxx@Malz1902 said in [gelöst]CC2531 an proxmox an LXC durchreichen scheitert...:
lxc.mount.entry: /dev/serial/by-id/xxx dev/serial/by-id/xxx none bind,optional,create=file
Hi, bei dir fehlt auch der slash vor dem 2. dev/serial
lxc.mount.entry: /dev/serial/by-id/xxx dev/serial/by-id/xxx none bind,optional,create=fileund du hast geschrieben.... das Beispiel von mir mit 2. Slash ist richtig...!?! Haben wir uns ggf. missverstanden?
-
@Malz1902 said in [gelöst]CC2531 an proxmox an LXC durchreichen scheitert...:
lxc.mount.entry: /dev/serial/by-id/xxx dev/serial/by-id/xxx none bind,optional,create=file
Hi, bei dir fehlt auch der slash vor dem 2. dev/serial
lxc.mount.entry: /dev/serial/by-id/xxx dev/serial/by-id/xxx none bind,optional,create=fileund du hast geschrieben.... das Beispiel von mir mit 2. Slash ist richtig...!?! Haben wir uns ggf. missverstanden?
@oberfragger meinte Zeile 2 ist richtig, so hab ich das zumindest be mir und es klappt
-
@Malz1902 said in [gelöst]CC2531 an proxmox an LXC durchreichen scheitert...:
mit Deinem US
Sorry dass ich fragen muss. Aber was ist jetzt die ID/xxx?
root@pve:~# ls -la /dev/serial/by-id
total 0
drwxr-xr-x 2 root root 60 Oct  5 23:13 .
drwxr-xr-x 4 root root 80 Oct  5 23:13 ..
lrwxrwxrwx 1 root root 13 Oct  5 23:13 usb-FTDI_FT230X_Basic_UART_D306QJU0-if00-port0 -> ../../ttyUSB0
usb-FTDI_FT230X_Basic_UART_D306QJU0-if00-port0 ?
@oberfragger said in [gelöst]CC2531 an proxmox an LXC durchreichen scheitert...:
usb-FTDI_FT230X_Basic_UART_D306QJU0-if00-port0
usb-FTDI_FT230X_Basic_UART_D306QJU0-if00-port0 ist die ID
also
lxc.mount.entry: /dev/serial/by-id/usb-FTDI_FT230X_Basic_UART_D306QJU0-if00-port0 dev/serial/by-id/usb-FTDI_FT230X_Basic_UART_D306QJU0-if00-port0 none bind,optional,create=file -
@oberfragger said in [gelöst]CC2531 an proxmox an LXC durchreichen scheitert...:
usb-FTDI_FT230X_Basic_UART_D306QJU0-if00-port0
usb-FTDI_FT230X_Basic_UART_D306QJU0-if00-port0 ist die ID
also
lxc.mount.entry: /dev/serial/by-id/usb-FTDI_FT230X_Basic_UART_D306QJU0-if00-port0 dev/serial/by-id/usb-FTDI_FT230X_Basic_UART_D306QJU0-if00-port0 none bind,optional,create=file@Malz1902 said in [gelöst]CC2531 an proxmox an LXC durchreichen scheitert...:
lxc.mount.entry: /dev/serial/by-id/usb-FTDI_FT230X_Basic_UART_D306QJU0-if00-port0 dev/serial/by-id/usb-FTDI_FT230X_Basic_UART_D306QJU0-if00-port0 none bind,optional,create=file
Danke. Das hatte ich gestern auch schon mal so eingetragen. Werde jetzt mal schauen ob ich den iobroker als VM hinbekomme. Würde gern Bluetooth haben...
EDIT: Ja, mit VM problemlos. Dabei habe ist festgestellt... mein NUC hat kein internes Bluetooth ;) Der vorhandene Dongle empfängt nix... ist aber auch asbach uralt- dre kann vermutlich nur BT1.0.
-
Ergänzung:
im letzten Post ist das
chmod o+rw /dev/ttyACM0der entscheidende Schritt, aber nicht alleine, da das zum Einen einen Reboot des proxmox-Host nicht übersteht und zum Anderen noch etwas fehlt.
Ich habe mich deshalb schlau gemacht, wie man unter Debian 10 rc.local wieder reaktiviert und dann eine rc.local mit folgendem Inhalt erstellt:
#!/bin/sh -e
#
# rc.local
#
# This script is executed at the end of each multiuser runlevel.
# Make sure that the script will "exit 0" on success or any other
# value on error.
#
# In order to enable or disable this script just change the execution
# bits.
#
# By default this script does nothing.

chmod o+rw /dev/ttyACM0
chmod o+rw /dev/bus/usb/001/003
exit 0
jetzt wird der ganze Eingriff persistent und übersteht problemlos einen Host-Reboot!
@xxjooo sagte in [gelöst]CC2531 an proxmox an LXC durchreichen scheitert...:
jetzt wird der ganze Eingriff persistent und übersteht problemlos einen Host-Reboot!
Top, vielen Dank für die Ergänzung der Anleitung von coldcorner, war grade ziemlich am rätseln wie ich meinen zigbee wieder in Gang bekomme (NUC musste woanders aufgestellt werden, also einmal runterfahren/ausschalten und danach ging nix mehr bzgl USB :-) )
Das hat bei mir auf Anhieb mit der Beschreibung geklappt, hab Debian10 und cat ging bei mir auch nicht, nano war aber kein Problem. -
Hi zusammen,
ich hoffe es ist okay wenn ich dieses Thema nochmal hoch hole?!Ich habe nun versucht nach dieser Anleitung meinen USB-Zigbee-Stick an einen Linux-Container durchzureichen. Dazu habe ich auf dem Proxmox die entsprechende Conf-Datei des Containers wie folgt geändert:
lxc.cgroup.devices.allow: c 189:* rwm
lxc.mount.entry: /dev/serial/by-id/usb-Texas_Instruments_TI_CC2531_USB_CDC___0X00124B001CDD462D-if00 dev/seri>
lxc.cgroup.devices.allow: c 166:* rwm
lxc.mount.entry: /dev/ttyACM0 dev/ttyACM0 none bind,optional,create=file
danach habe ich den Befehl
chmod o+rw /dev/serial/by-id/usb-Texas_Instruments_TI_CC2531_USB_CDC___0X00124B001CDD462D-if00ausgeführt und den LXC rebootet.
Die Ausgaben auf dem Container ergeben nun folgendes:
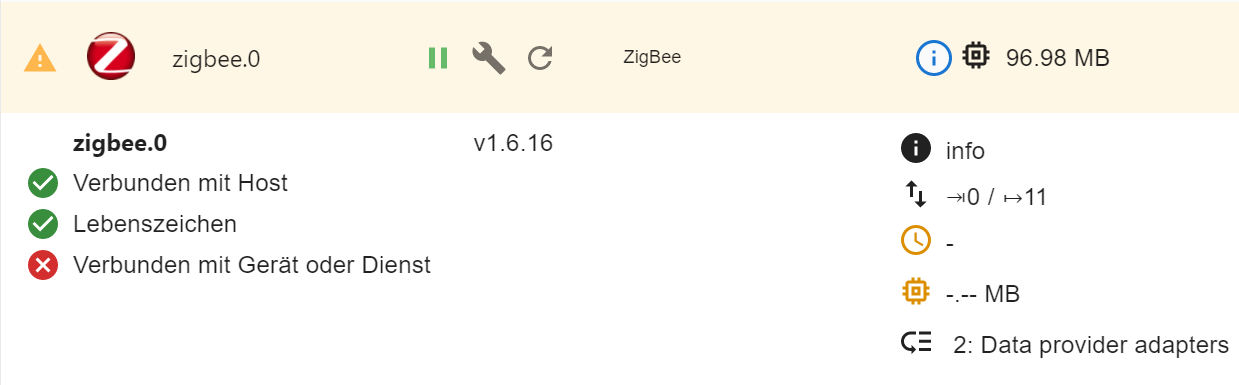
root@iobroker-produktiv:~# lsusb
Bus 004 Device 002: ID 8087:8000 Intel Corp.
Bus 004 Device 001: ID 1d6b:0002 Linux Foundation 2.0 root hub
Bus 002 Device 002: ID 8087:8008 Intel Corp.
Bus 002 Device 001: ID 1d6b:0002 Linux Foundation 2.0 root hub
Bus 003 Device 001: ID 1d6b:0003 Linux Foundation 3.0 root hub
Bus 001 Device 003: ID 8087:07dc Intel Corp.
Bus 001 Device 004: ID 0451:16a8 Texas Instruments, Inc. CC2531 ZigBee
Bus 001 Device 002: ID 040b:2013 Weltrend Semiconductor GiGa HiD
Bus 001 Device 001: ID 1d6b:0002 Linux Foundation 2.0 root hub
root@iobroker-produktiv:~# ls -l /dev/tty* crw-rw-rw- 1 nobody nogroup 5, 0 Mar 10 18:14 /dev/tty crw------- 1 root tty 136, 1 Mar 11 11:40 /dev/tty1 crw--w---- 1 root tty 136, 2 Mar 10 20:09 /dev/tty2 crw-rw-rw- 1 nobody nogroup 166, 0 Mar 11 11:30 /dev/ttyACM0root@iobroker-produktiv:~# ls -la /dev/serial/by-id total 0 drwxr-xr-x 2 root root 60 Mar 10 20:09 . drwxr-xr-x 3 root root 60 Mar 10 20:09 .. crw-rw-rw- 1 nobody nogroup 166, 0 Mar 11 11:30 usb-Texas_Instruments_TI_CC2531_USB_CDC___0X00124B001CDD462D-if00Mit meinen bisher wenigen Linux-Verstand steht der Stick dem Container doch zur Verfügung, aber die Zigbee-Instanz im iOBroker wird nicht grün
Wo ist mein Fehler, was muss ich machen, im den Stick auch in dem LXC verwenden zu können?
Danke und sonnige Grüße
Rik -
Hi zusammen,
ich hoffe es ist okay wenn ich dieses Thema nochmal hoch hole?!Ich habe nun versucht nach dieser Anleitung meinen USB-Zigbee-Stick an einen Linux-Container durchzureichen. Dazu habe ich auf dem Proxmox die entsprechende Conf-Datei des Containers wie folgt geändert:
lxc.cgroup.devices.allow: c 189:* rwm
lxc.mount.entry: /dev/serial/by-id/usb-Texas_Instruments_TI_CC2531_USB_CDC___0X00124B001CDD462D-if00 dev/seri>
lxc.cgroup.devices.allow: c 166:* rwm
lxc.mount.entry: /dev/ttyACM0 dev/ttyACM0 none bind,optional,create=file
danach habe ich den Befehl
chmod o+rw /dev/serial/by-id/usb-Texas_Instruments_TI_CC2531_USB_CDC___0X00124B001CDD462D-if00ausgeführt und den LXC rebootet.
Die Ausgaben auf dem Container ergeben nun folgendes:
root@iobroker-produktiv:~# lsusb
Bus 004 Device 002: ID 8087:8000 Intel Corp.
Bus 004 Device 001: ID 1d6b:0002 Linux Foundation 2.0 root hub
Bus 002 Device 002: ID 8087:8008 Intel Corp.
Bus 002 Device 001: ID 1d6b:0002 Linux Foundation 2.0 root hub
Bus 003 Device 001: ID 1d6b:0003 Linux Foundation 3.0 root hub
Bus 001 Device 003: ID 8087:07dc Intel Corp.
Bus 001 Device 004: ID 0451:16a8 Texas Instruments, Inc. CC2531 ZigBee
Bus 001 Device 002: ID 040b:2013 Weltrend Semiconductor GiGa HiD
Bus 001 Device 001: ID 1d6b:0002 Linux Foundation 2.0 root hub
root@iobroker-produktiv:~# ls -l /dev/tty* crw-rw-rw- 1 nobody nogroup 5, 0 Mar 10 18:14 /dev/tty crw------- 1 root tty 136, 1 Mar 11 11:40 /dev/tty1 crw--w---- 1 root tty 136, 2 Mar 10 20:09 /dev/tty2 crw-rw-rw- 1 nobody nogroup 166, 0 Mar 11 11:30 /dev/ttyACM0root@iobroker-produktiv:~# ls -la /dev/serial/by-id total 0 drwxr-xr-x 2 root root 60 Mar 10 20:09 . drwxr-xr-x 3 root root 60 Mar 10 20:09 .. crw-rw-rw- 1 nobody nogroup 166, 0 Mar 11 11:30 usb-Texas_Instruments_TI_CC2531_USB_CDC___0X00124B001CDD462D-if00Mit meinen bisher wenigen Linux-Verstand steht der Stick dem Container doch zur Verfügung, aber die Zigbee-Instanz im iOBroker wird nicht grün
Wo ist mein Fehler, was muss ich machen, im den Stick auch in dem LXC verwenden zu können?
Danke und sonnige Grüße
Rik@rikdrs sagte in [gelöst]CC2531 an proxmox an LXC durchreichen scheitert...:
was muss ich machen
probier es mal damit, siehe Anleitung Usb Geräte durchreichen
-
Hi zusammen,
ich hoffe es ist okay wenn ich dieses Thema nochmal hoch hole?!Ich habe nun versucht nach dieser Anleitung meinen USB-Zigbee-Stick an einen Linux-Container durchzureichen. Dazu habe ich auf dem Proxmox die entsprechende Conf-Datei des Containers wie folgt geändert:
lxc.cgroup.devices.allow: c 189:* rwm
lxc.mount.entry: /dev/serial/by-id/usb-Texas_Instruments_TI_CC2531_USB_CDC___0X00124B001CDD462D-if00 dev/seri>
lxc.cgroup.devices.allow: c 166:* rwm
lxc.mount.entry: /dev/ttyACM0 dev/ttyACM0 none bind,optional,create=file
danach habe ich den Befehl
chmod o+rw /dev/serial/by-id/usb-Texas_Instruments_TI_CC2531_USB_CDC___0X00124B001CDD462D-if00ausgeführt und den LXC rebootet.
Die Ausgaben auf dem Container ergeben nun folgendes:
root@iobroker-produktiv:~# lsusb
Bus 004 Device 002: ID 8087:8000 Intel Corp.
Bus 004 Device 001: ID 1d6b:0002 Linux Foundation 2.0 root hub
Bus 002 Device 002: ID 8087:8008 Intel Corp.
Bus 002 Device 001: ID 1d6b:0002 Linux Foundation 2.0 root hub
Bus 003 Device 001: ID 1d6b:0003 Linux Foundation 3.0 root hub
Bus 001 Device 003: ID 8087:07dc Intel Corp.
Bus 001 Device 004: ID 0451:16a8 Texas Instruments, Inc. CC2531 ZigBee
Bus 001 Device 002: ID 040b:2013 Weltrend Semiconductor GiGa HiD
Bus 001 Device 001: ID 1d6b:0002 Linux Foundation 2.0 root hub
root@iobroker-produktiv:~# ls -l /dev/tty* crw-rw-rw- 1 nobody nogroup 5, 0 Mar 10 18:14 /dev/tty crw------- 1 root tty 136, 1 Mar 11 11:40 /dev/tty1 crw--w---- 1 root tty 136, 2 Mar 10 20:09 /dev/tty2 crw-rw-rw- 1 nobody nogroup 166, 0 Mar 11 11:30 /dev/ttyACM0root@iobroker-produktiv:~# ls -la /dev/serial/by-id total 0 drwxr-xr-x 2 root root 60 Mar 10 20:09 . drwxr-xr-x 3 root root 60 Mar 10 20:09 .. crw-rw-rw- 1 nobody nogroup 166, 0 Mar 11 11:30 usb-Texas_Instruments_TI_CC2531_USB_CDC___0X00124B001CDD462D-if00Mit meinen bisher wenigen Linux-Verstand steht der Stick dem Container doch zur Verfügung, aber die Zigbee-Instanz im iOBroker wird nicht grün
Wo ist mein Fehler, was muss ich machen, im den Stick auch in dem LXC verwenden zu können?
Danke und sonnige Grüße
Rik -
@rikdrs sagte in [gelöst]CC2531 an proxmox an LXC durchreichen scheitert...:
was muss ich machen
probier es mal damit, siehe Anleitung Usb Geräte durchreichen
@crunchip said in [gelöst]CC2531 an proxmox an LXC durchreichen scheitert...:
@rikdrs sagte in [gelöst]CC2531 an proxmox an LXC durchreichen scheitert...:
was muss ich machen
probier es mal damit, siehe Anleitung Usb Geräte durchreichen
genauso hab ich es gemacht - außer die UDEV-Regel
die kommt, wenn die Instanz läuft
Hey! Du scheinst an dieser Unterhaltung interessiert zu sein, hast aber noch kein Konto.
Hast du es satt, bei jedem Besuch durch die gleichen Beiträge zu scrollen? Wenn du dich für ein Konto anmeldest, kommst du immer genau dorthin zurück, wo du zuvor warst, und kannst dich über neue Antworten benachrichtigen lassen (entweder per E-Mail oder Push-Benachrichtigung). Du kannst auch Lesezeichen speichern und Beiträge positiv bewerten, um anderen Community-Mitgliedern deine Wertschätzung zu zeigen.
Mit deinem Input könnte dieser Beitrag noch besser werden 💗
Registrieren Anmelden285
Online33.0k
Benutzer83.5k
Themen1.3m
Beiträge