NEWS
Test Adapter Pylontech v0.0.10
-
@plchome-0 Laut Beschreibung können beide Umsetzer (der von mir vorgeschlagene wie auch der von l1berty verwendete) 100Mbit. Auszug aus der Beschreibung des Herstellers:
10/100M Auto-MDI/MDIX ethernet interface, regardless of cross-over or straight-through cableDer Switch, an dem der Umsetzer bei mir angeschlossen ist (Unifi USW Flex mini), meldet eine Fast-Ethernet-Verbindung (100Mbit).
-
Nabend, bin weiter am testen mit der ESP TCP Bridge.
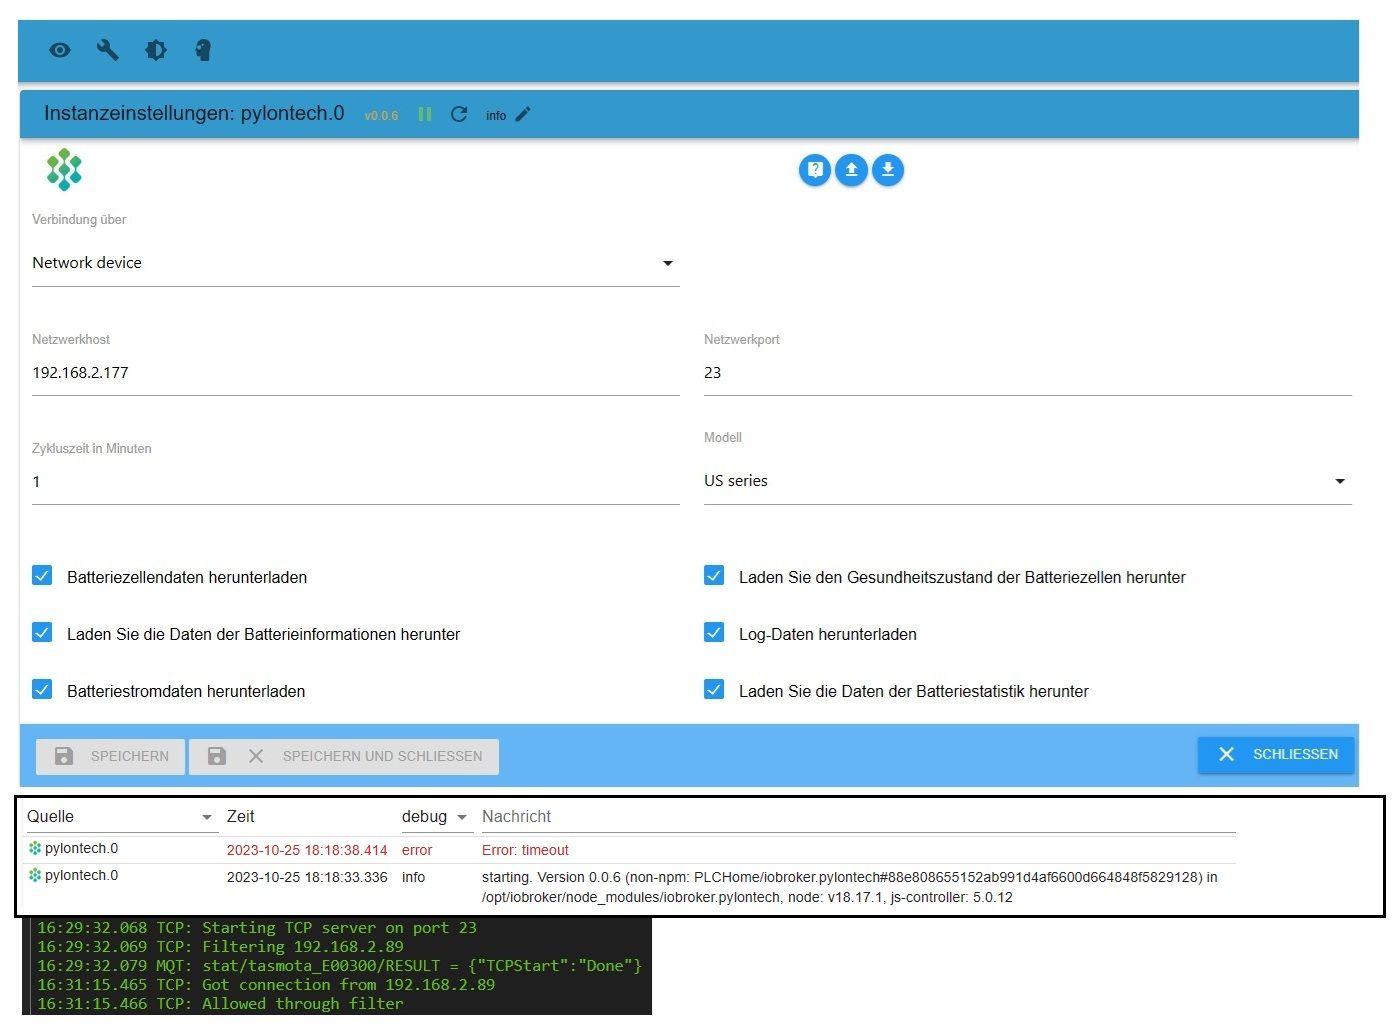
Was wird bei Netzwerkhost eingetragen ? Die IP der ESP TCP Bridge ohne http
bei mir dann 192.168.2.177 ?Trockenlauf :
Vom Windows PC TCP Client über ESP TCP Bridge nach Hterm geht.
Von Hterm über ESP TCP Bridge nach Windows PC TCP Client geht.
Wireshark zeigt Telnet als Protokoll an.
Also sind die Kabelwege in Ordnung.
192.168.2.89 ist IO Broker mit dem Adapter
-
Nabend, bin weiter am testen mit der ESP TCP Bridge.
Was wird bei Netzwerkhost eingetragen ? Die IP der ESP TCP Bridge ohne http
bei mir dann 192.168.2.177 ?Trockenlauf :
Vom Windows PC TCP Client über ESP TCP Bridge nach Hterm geht.
Von Hterm über ESP TCP Bridge nach Windows PC TCP Client geht.
Wireshark zeigt Telnet als Protokoll an.
Also sind die Kabelwege in Ordnung.
192.168.2.89 ist IO Broker mit dem Adapter
-
Der Akku ist gar nicht angeschlossen.
Der Adapter müsste ja eine Anfrage zur Batterie senden.
Mit Wireshark ist keine Kommunikation vom Adapter zum ESP zu sehen. -
Der Akku ist gar nicht angeschlossen.
Der Adapter müsste ja eine Anfrage zur Batterie senden.
Mit Wireshark ist keine Kommunikation vom Adapter zum ESP zu sehen.@ralla66 Lade den Adapter auf deinem hTerm Rechner von Github herunter, npm geht nicht und starte statt hTerm auf dem Rechner in der Root der Quellen.
https://github.com/PLCHome/ioBroker.pylontech/archive/refs/heads/master.zip
node build/moc/serialMoc.js <port> 115200 USAber es ist komisch unter hTerm hättest du das erste Komando "pwr" sehen müssen.
Und im wireshark auch. -
@ralla66 Lade den Adapter auf deinem hTerm Rechner von Github herunter, npm geht nicht und starte statt hTerm auf dem Rechner in der Root der Quellen.
https://github.com/PLCHome/ioBroker.pylontech/archive/refs/heads/master.zip
node build/moc/serialMoc.js <port> 115200 USAber es ist komisch unter hTerm hättest du das erste Komando "pwr" sehen müssen.
Und im wireshark auch.Also läuft der Adapter nicht auf meinem Raspi 4 mit IO ?
-
Also läuft der Adapter nicht auf meinem Raspi 4 mit IO ?
@ralla66 Irgendwie ist mir das hier zu blöd:
Zuerst schreibst du, dass du mit Hterm gegen einen gefummelten TCP/V24 Adapter getestet hast.Also:
Verbinde deine Raspberry IO Installation in der du den ioBroker-Pylontech-Adapter installiert hast zu deinen TCP/V24 Adapter. Den TCP/V24 Adapter mit deinem Testrechner und starte dadrauf die Akkuemulation, also den serialMocDan läuft der Adapter.
Sollte es nicht funktionieren, dann prüfe bitte deinen Aufbau/Hardware oder Konfiguration.
Es geht nämlich das Gerücht rum, dass der ioBroker-Pylontech-Adapter funktioniert!
Deinen Adapter kannst du mit Putty in raw und hTerm prüfen.
-
@ralla66 Irgendwie ist mir das hier zu blöd:
Zuerst schreibst du, dass du mit Hterm gegen einen gefummelten TCP/V24 Adapter getestet hast.Also:
Verbinde deine Raspberry IO Installation in der du den ioBroker-Pylontech-Adapter installiert hast zu deinen TCP/V24 Adapter. Den TCP/V24 Adapter mit deinem Testrechner und starte dadrauf die Akkuemulation, also den serialMocDan läuft der Adapter.
Sollte es nicht funktionieren, dann prüfe bitte deinen Aufbau/Hardware oder Konfiguration.
Es geht nämlich das Gerücht rum, dass der ioBroker-Pylontech-Adapter funktioniert!
Deinen Adapter kannst du mit Putty in raw und hTerm prüfen.
gefummelt, ah ja.
Danke für die Kommunikation. -
-
@der-jeti wenn der auch einen Konsolenport hat. Ja dafür müsstest du den Konsolenport mit einem Rechner verbinden auf dem NodeJs oder der ioBroker läuft.
Der Adapter enthält Shell Funktionen um eine Referenz mit zu schneiden.@plchome-0 ja, hat er. Werde mich morgen mal dran machen.
-
@plchome-0 ja, hat er. Werde mich morgen mal dran machen.
-
Hi, ich habe auch einen US3000C und würde den ganz gerne mittels deinem Adapter abfragen wollen.
Ich habe den Pylontech über die RS232 des RJ45 an einen MAX3232 angeschlossen und die UART direkt an den Pi4.Muss ich das jetzt noch wie folgt konfigurieren?
SOFTWARE USE OF THE SERIAL PORT
If you intend to use the serial port for a software application running on the Raspberry Pi, there is a bit of configuration required to disable the console from using this port.   By default, the serial port is configured as a console port for interacting with the Linux OS shell.  The following steps will guide you through disabling the port from console access.

First, lets make of backup of the two files that we intend to modify.

sudo cp /boot/cmdline.txt /boot/cmdline.bak
sudo cp /etc/inittab /etc/inittab.bak
Next, we need to remove the "console=ttyAMA0,115200" and "kgdboc=ttyAMA0,115200" configuration parameters from the "/boot/cmdline.txt" configuration file.

To edit the file use this command:

sudo nano /boot/cmdline.txt
The file probably contains this default configuration line:

dwc_otg.lpm_enable=0 console=ttyAMA0,115200 kgdboc=ttyAMA0,115200
console=tty1 root=/dev/mmcblk0p2 rootfstype=ext4 elevator=deadline rootwait
After removing the two configuration parameters, it will look similar to this:

dwc_otg.lpm_enable=0 console=tty1 root=/dev/mmcblk0p2 rootfstype=ext4
elevator=deadline rootwait


The last step is to edit the "/etc/inittab" file and comment out the use of the "ttyAMA0" serial port.  To edit the file use this command:

sudo nano /etc/inittab
Now towards the bottom of the file, look for a configuration line that includes the "ttyAMA0" port address.


Place a pound sign ("#") in front of the line to comment it out.  With a pound sign ("#") at the beginning of the line, Linux will ignore this configuration line.


Save the "/etc/inittab" file and then issue this command to reboot the Raspberry Pi:

sudo reboot
Now you are ready to use the serial port with a software application and the operating system won't interfere with the port.  Use the device address "ttyAMA0" in your application to access this serial port.
Und gebe ich dann unter lokaler Geräteadresse "ttyAMA0" ein?
-
Adapter meldet "Error: Error: Input/output error setting custom baud rate of 115200"
Seltsamerweise sehe ich mit dem Scope weder beim Pylontech noch bei dem Pi irgendetwas tackern auf der UART.
-
Adapter meldet "Error: Error: Input/output error setting custom baud rate of 115200"
Seltsamerweise sehe ich mit dem Scope weder beim Pylontech noch bei dem Pi irgendetwas tackern auf der UART.
@hg6806 also der Stack kann die Geschwindigkeit nicht setzen. Kann auch an rechten liegen mach mal einen
sudo chmod 777 /dev/ttyS0
Du kannst die Schnittstelle auch von der Console öffnen
sudo apt install cu
cu -l /dev/ttyS0 -s 115200Oder sudo cu
Die Schnittstelle bitte noch gegen deine tauschen..
-
@hg6806 also der Stack kann die Geschwindigkeit nicht setzen. Kann auch an rechten liegen mach mal einen
sudo chmod 777 /dev/ttyS0
Du kannst die Schnittstelle auch von der Console öffnen
sudo apt install cu
cu -l /dev/ttyS0 -s 115200Oder sudo cu
Die Schnittstelle bitte noch gegen deine tauschen..
-
@hg6806 hi, da ich aktuell keinen Pi im Einsatz habe kann ich nur Ratschläge geben. Gehe eine Anleitung für dein Pi Modell und die Linux Version durch um die Schnittstelle einzurichten.
Am besten testen kannst du die Kommunikation mit einen Terminalprogramm wie cu. Du brückst rx und tx (gpio 14 und gpio 15) wenn du das siehst was du schreibst funktioniert der Port. Danach schließt du den Max an und Brückst dort rx und tx. Solltest du da auch das sehen was du schreibst kannst du den Akku anschließen. Im CU kann man dann Enter drücken und sieht die Konsole. Bingo dann den Adaper einrichten.
Hi, hatte noch ein paar andere Baustellen.
Also über die UART habe ich es leider nicht hinbekommen. Da ist irgendwas im Argen, CU hatte direkt ein HangUp gemeldet.
Aber egal, ich habe es über einen USB-RS232 Adapter hinbekommen und direkt alle Daten von beiden Speichern bekommen.
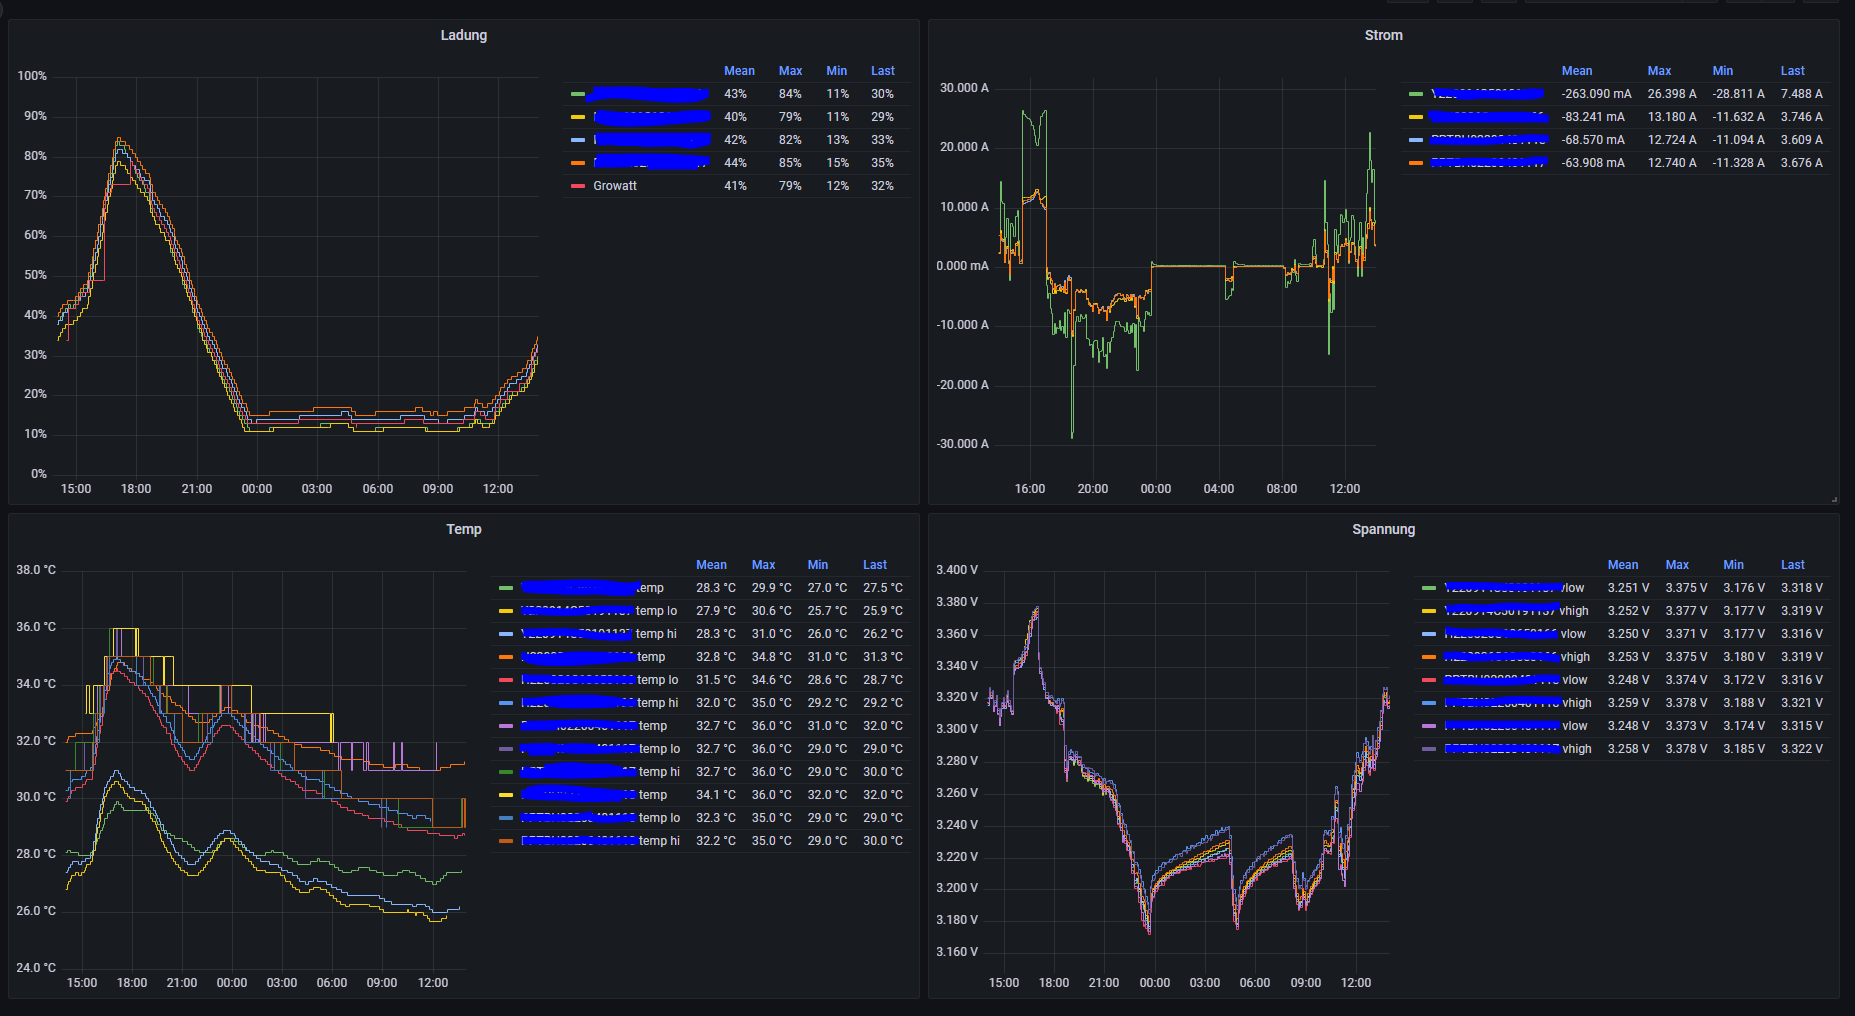
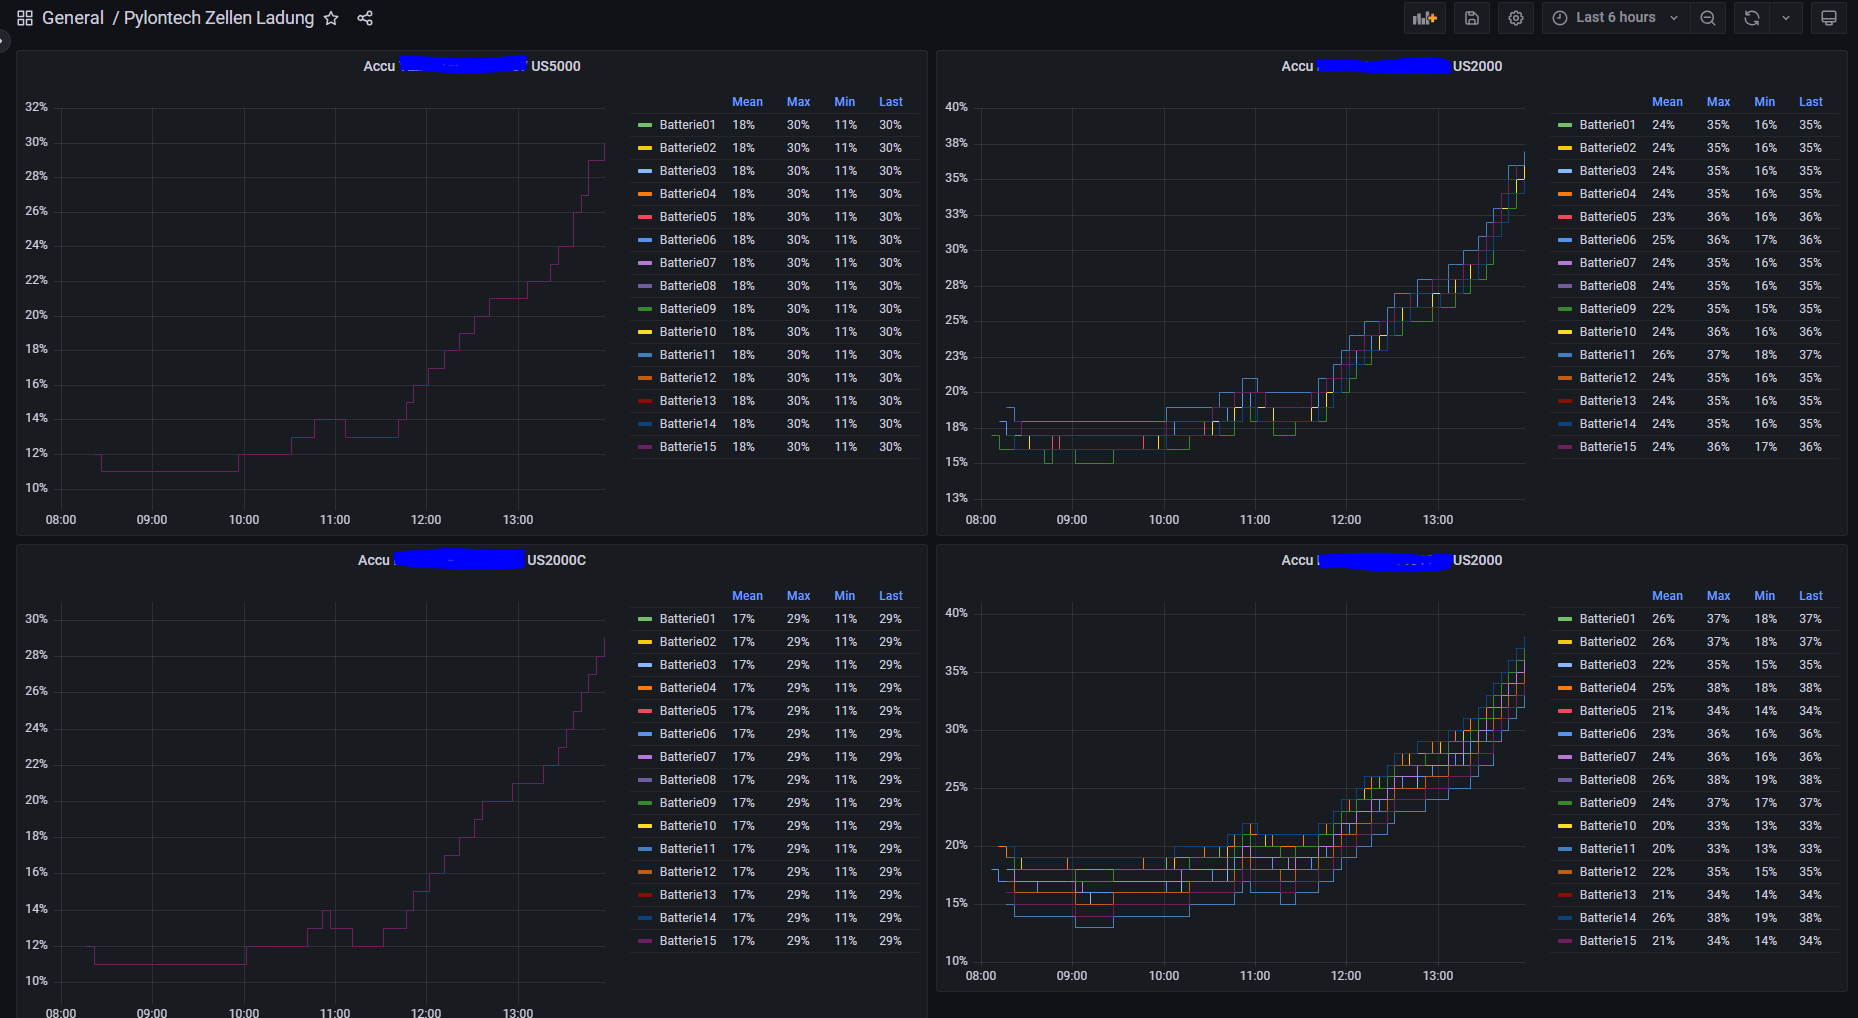
Danke dafür, coole Sache!Sag mal, wie hast du die Visualisierung im 1. Post gemacht. Kannst du das evtl. zur Verfügung stellen?


