
WS2812B LED über FHEM in ioBroker mit VIS Steuern
-
Moin,
Version 0.1 01.12.2017
- Erste Version von der Anleitung
eine kleine kurze Anleitung von mir um die LED Stripes WS2812B zu steuern.
Leider bekomme ich aufgrund von mangelndem Fachwissen nicht hin den Umweg über FHEM zu sparen. Ich wäre hier für Tips und Hilfe dankbar!!!
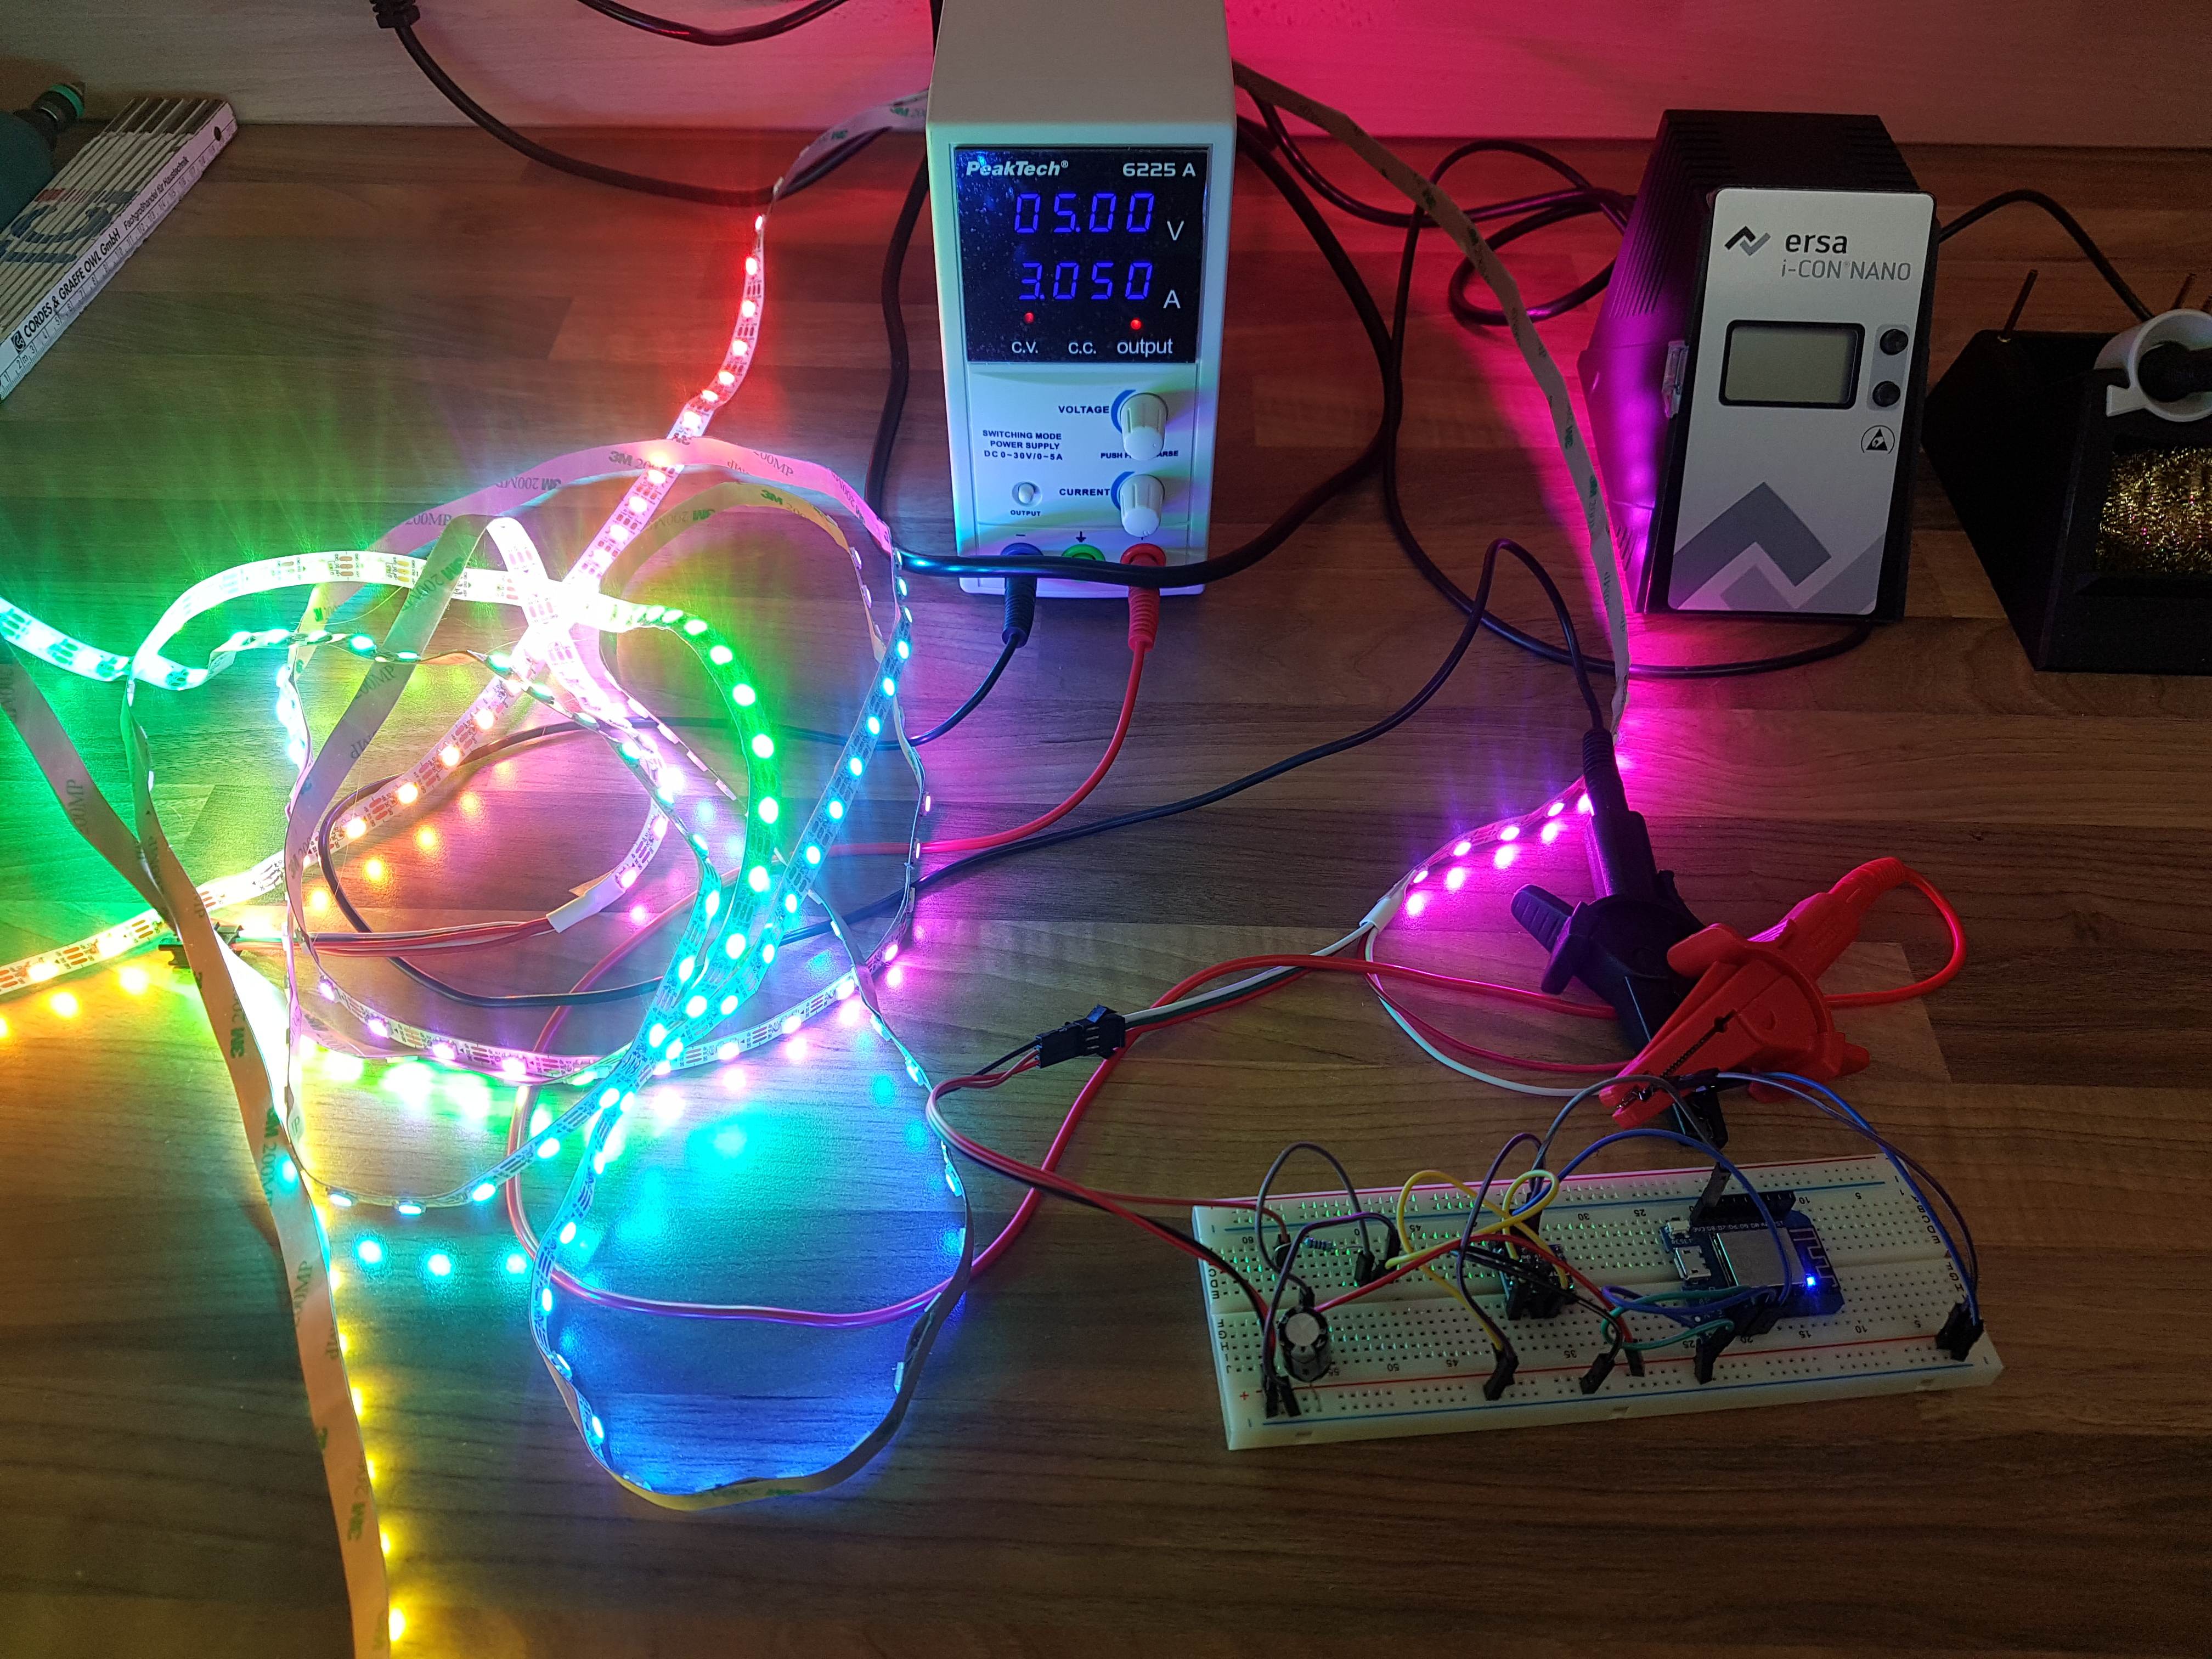
Die benötigten Bauteile:
! Wemos D1 (kann auch ein NODEMCU sein)
! Ein WS2812B Stripe
! für den Versuchsaufbau nehme ich ein Breadboard und einige Verbinder Leitungen
! Spannungsversorgung von 5V (für die volle Leuchtstärke mind. 4 Ampere bei einem 5Meter Band)
! Logic Level Shifter ( habe ich genommen um die 3,3V Steuerspannung vom Wemos auf 5V zu bekommen. Ob das ein muss ist weiß ich nicht mein Stripe arbeitet aber mit 5V und sah ich als Sinnvoll an )
! Widerstand 220 Ohm bis 470 Ohm (ich habe 470 Ohm genommen)
! Kondensator 1000µFDer ungefähre Aufbau ist hier ganz gut Bildlich zu sehen (Quelle heise.de)
!

<link_text text="https://www.heise.de/developer/imgs/06/ ... 43af43.png">https://www.heise.de/developer/imgs/06/1/8/5/9/1/4/1/circuit-Neopixel-Strip-ef7227313843af43.png</link_text>" />~~Elektrischer Anschluss! An der Spannungsversorgung schließen wir den Kondensator an. Von da einmal 5V und GND zum Wemos und einmal zum WS2812B Stripe.
! Dem Wemos versorgen wir mit Ground und 5V
! Als Datenpin nehme ich den D4 (GPIO2) des Wemos.
! # Optional zwischen dem D4 und dem Widerstand einen Logic Level Shifter.
! Vom Datenpin D4 zum Widerstand und vom Widerstand zum DIN vom WS2812BWemos D1 Firmware
! Wemos D1 habe ich mit folgender Firmware geflasht.
! https://github.com/djcysmic/NeopixelBusFX
! Die Firmware ist eine Modifizierte ESPEasy Version.
! Die Firmware bitte mit W-Lan und IP sowie FHEM HTTP als Controller einrichten.FHEM
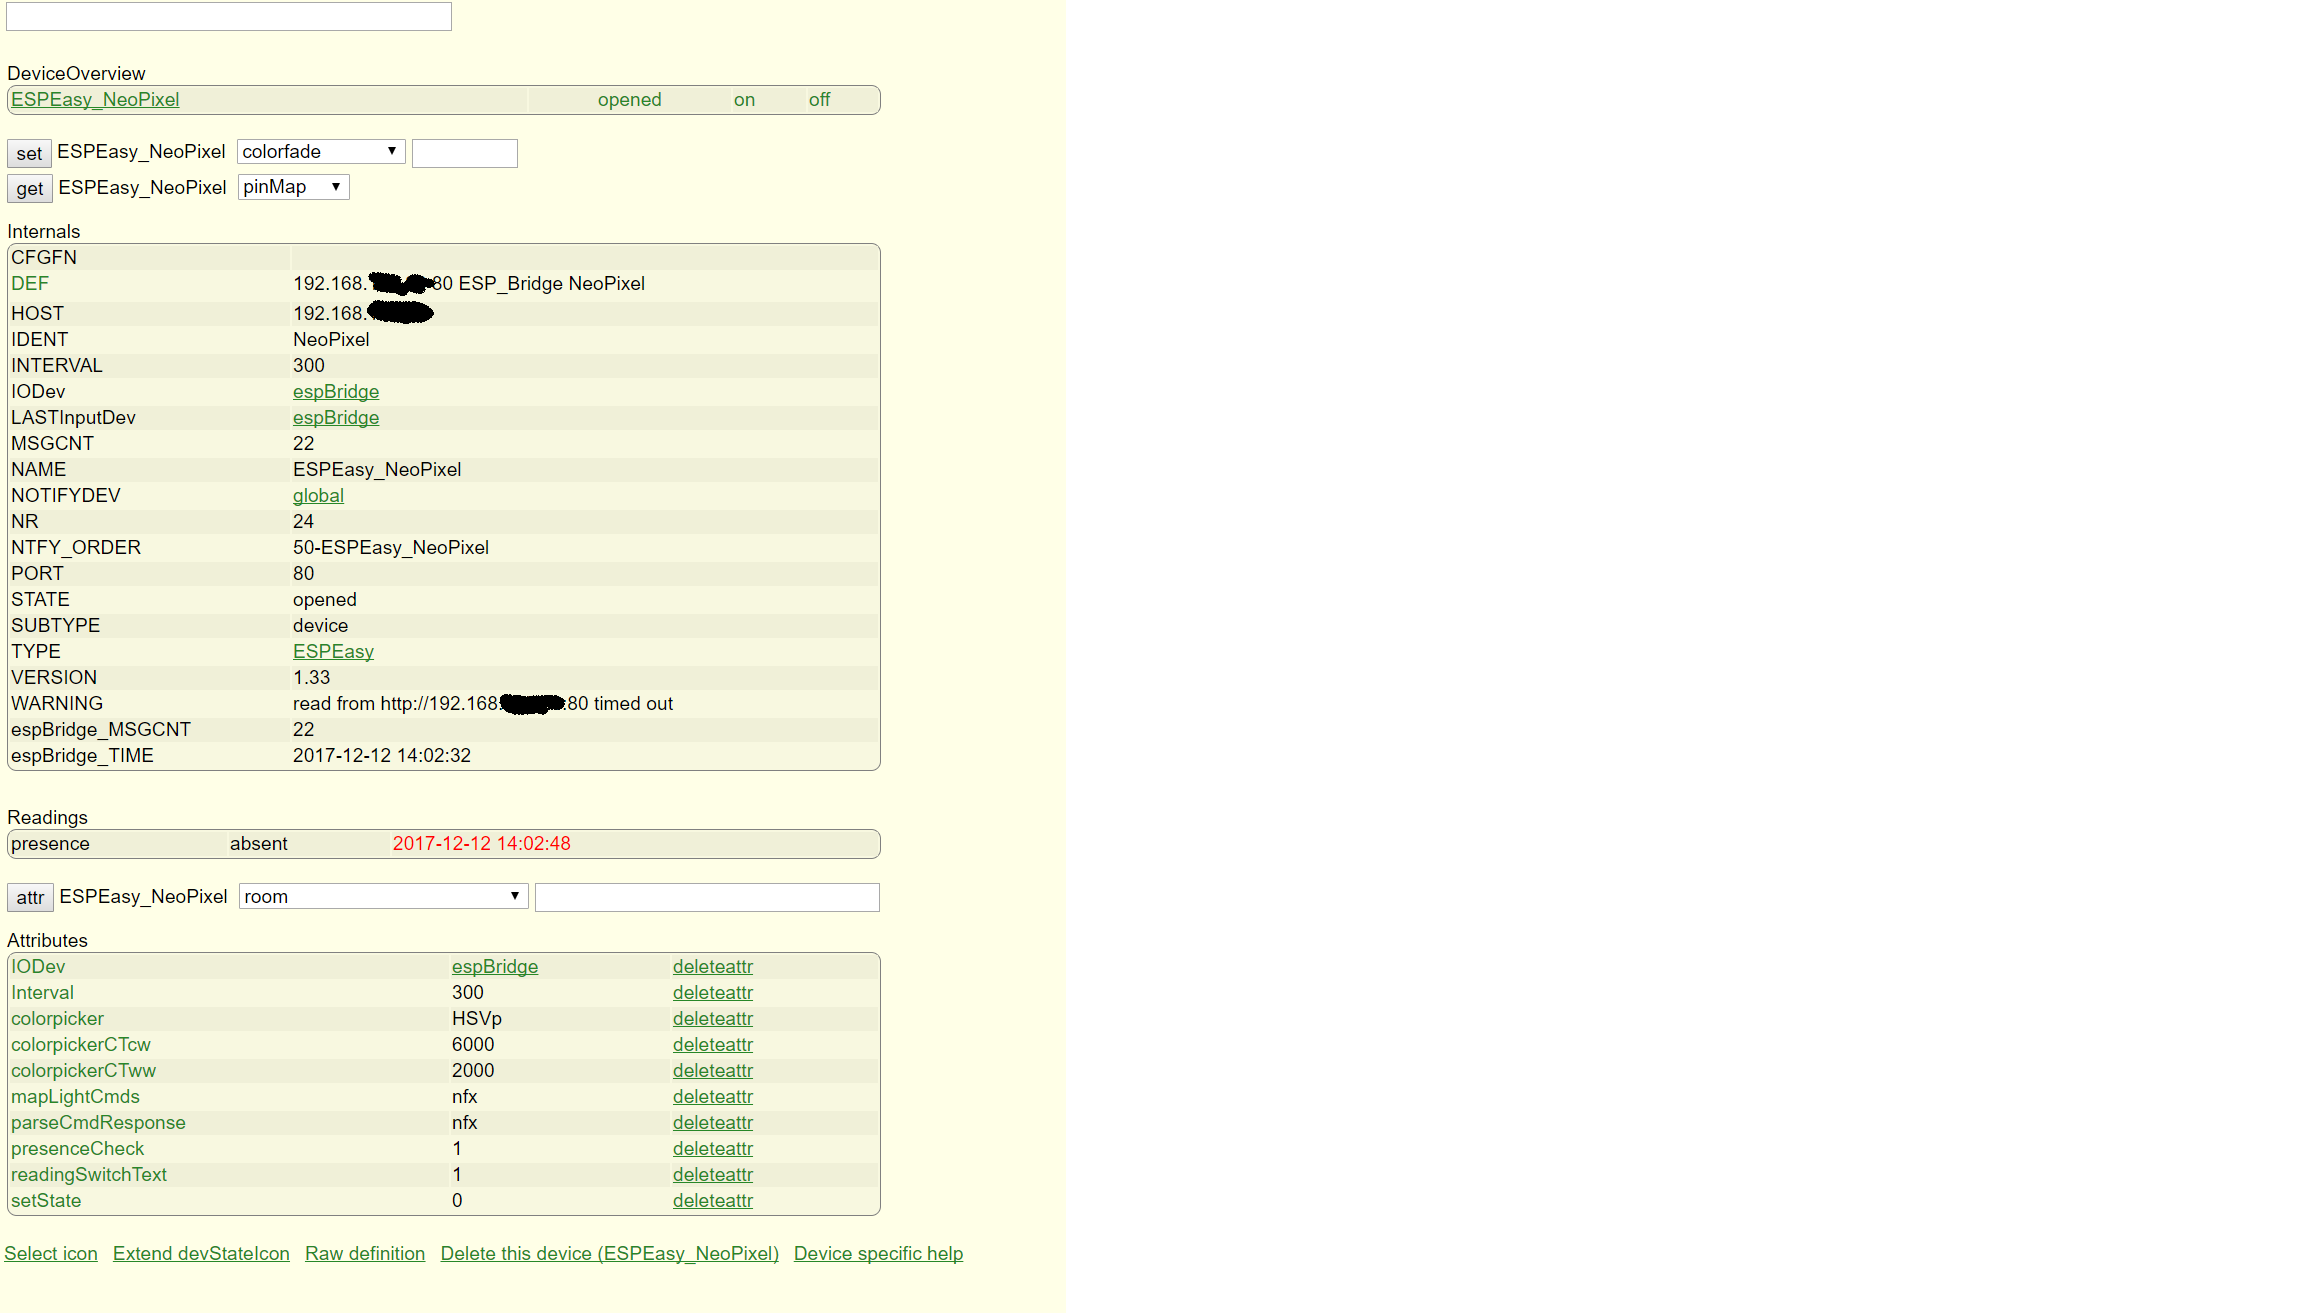
! In FHEM nun folgendes eingeben (bitte IP anpassen):
defmod ESPEasy_NeoPixel ESPEasy 192.168.X.X 80 ESP_Bridge NeoPixel
attr ESPEasy_NeoPixel Interval 300
attr ESPEasy_NeoPixel colorpicker HSVp
attr ESPEasy_NeoPixel colorpickerCTcw 6000
attr ESPEasy_NeoPixel colorpickerCTww 2000
attr ESPEasy_NeoPixel mapLightCmds nfx
attr ESPEasy_NeoPixel presenceCheck 1
attr ESPEasy_NeoPixel readingSwitchText 1
attr ESPEasy_NeoPixel setState 0
attr ESPEasy_NeoPixel parseCmdResponse nfx
ioBroker
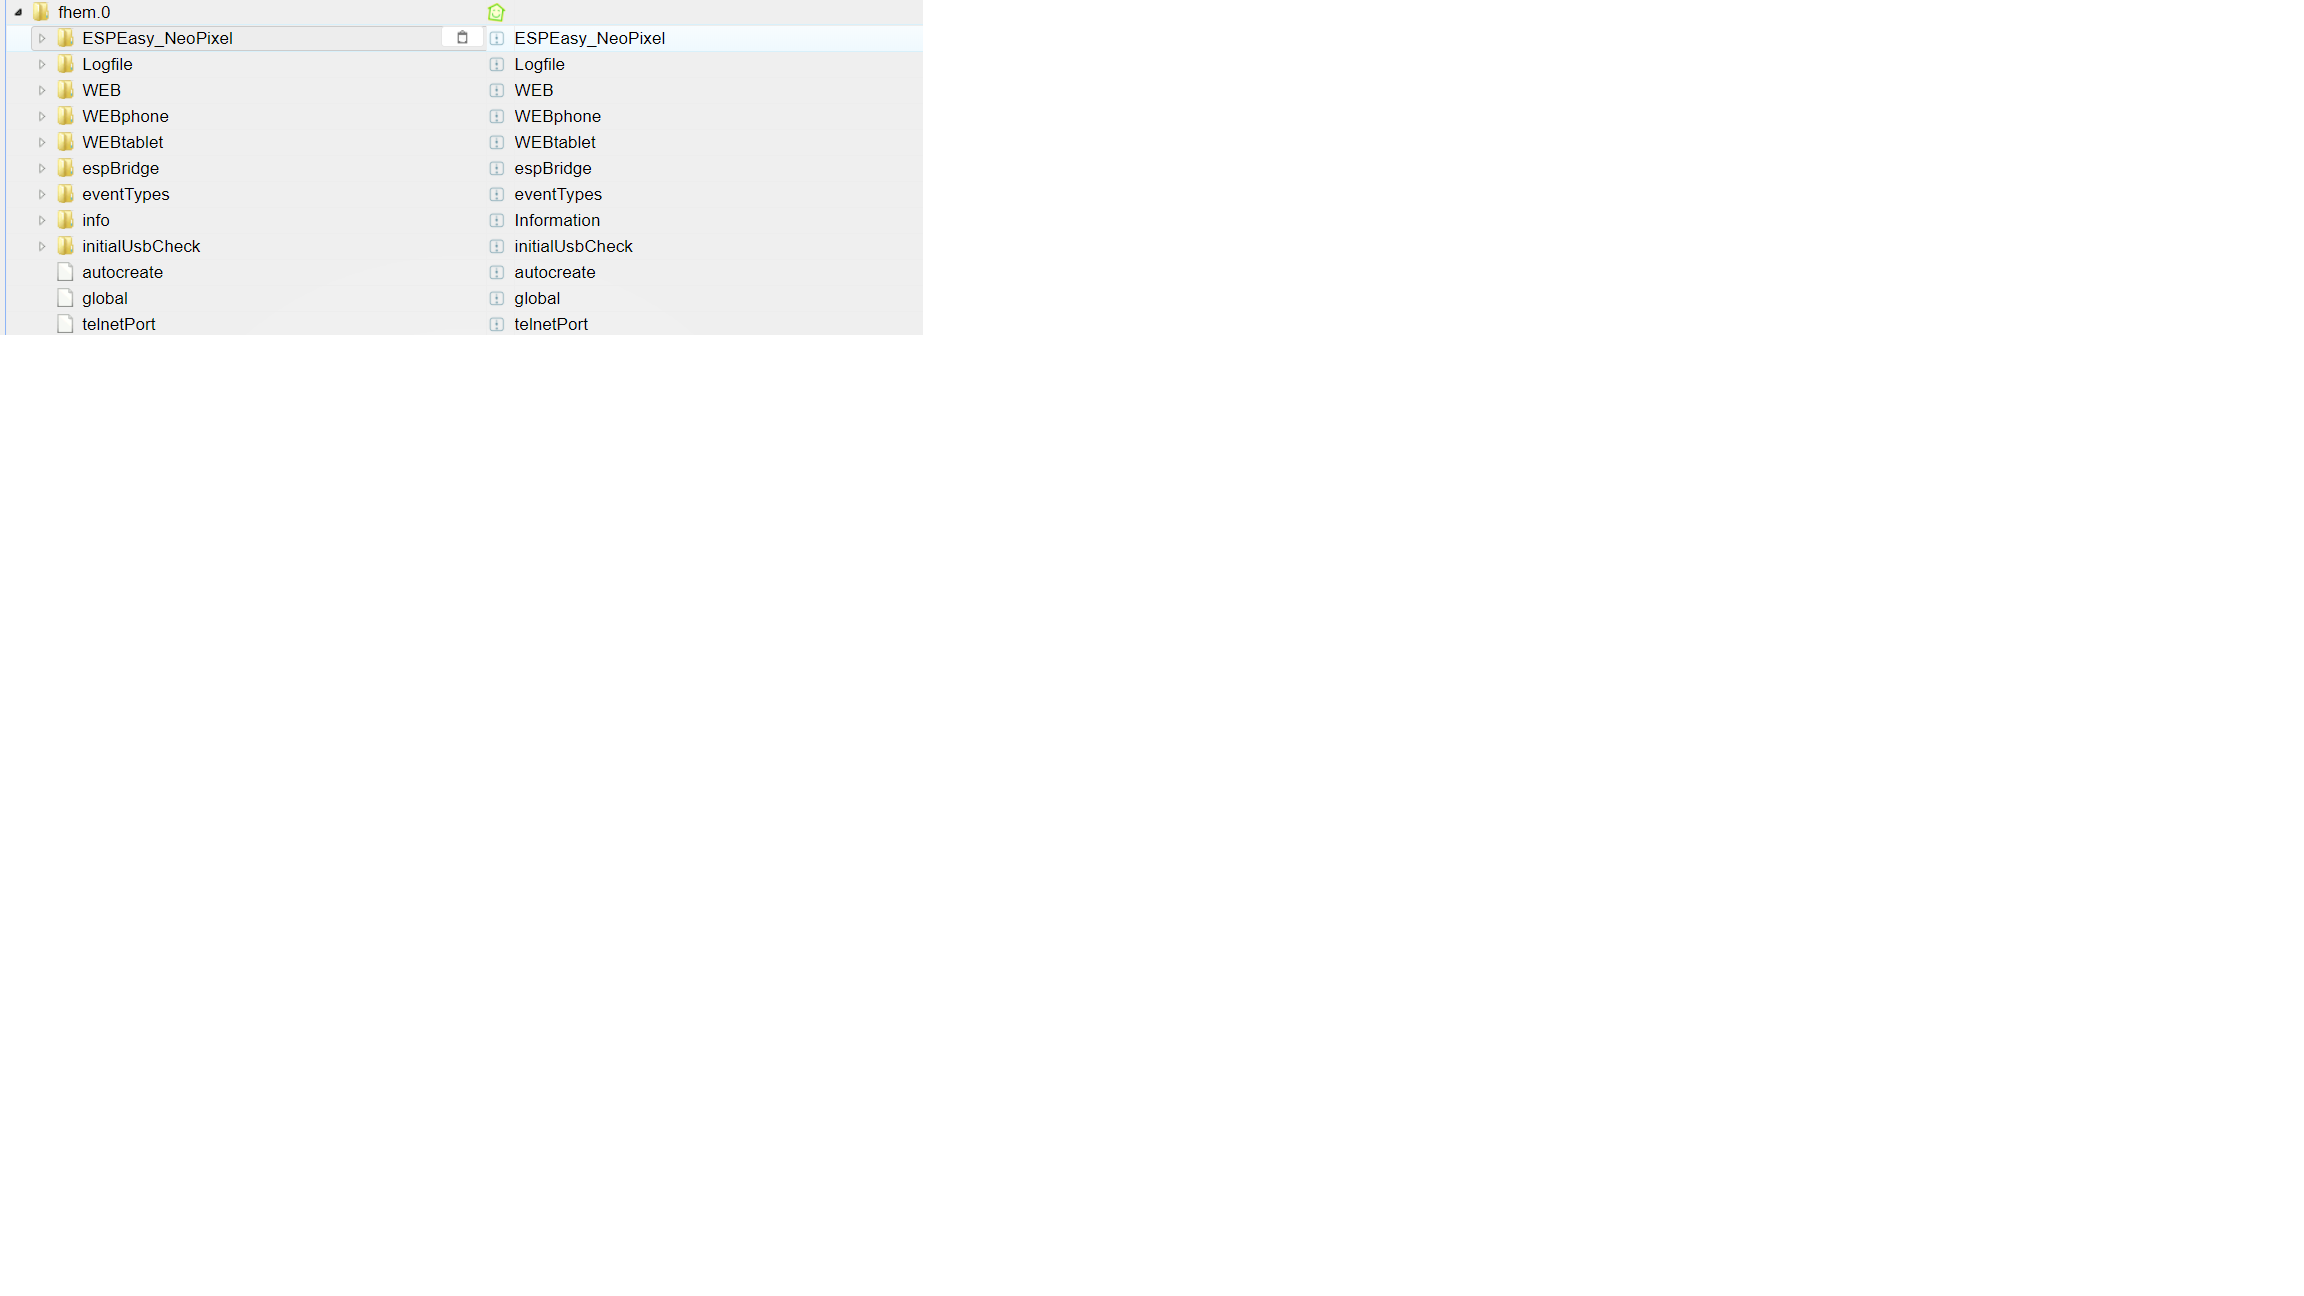
! In ioBroker den FHEM Adapter falls noch nicht vorhanden installieren und einrichten oder einmal neu starten und den Adapter neu zu Syncronisieren.
Nun sollte ein neues Objekt unter FHEM angelegt werden womit ihr euren Stripe per VIS steuern könnt.
Vis Einbindung kommt später in die Anleitung.
Bild:
!
Falls es jemand nachgebaut hat bitte eine kurze Rückmeldung wo es Probleme gab oder es gut geklappt hat.~~
-
Hallo zusammen,
den NodeMCU habe ich mit der firmware4096.bin geflasht und ESP Easy eingerichtet (Mit dem Wlan verbunden und die entsprechende FHEM Controller IP eingetragen).
Der FHEM Adapter im ioBroker ist ebenfalls installiert, nach der anschließenden Synchronisation sind einige Objekte aufgetaucht.
Der Data Pin liegt, wie im Beitrag beschrieben, auf Pin D4.
Ab hier weiß ich jetzt allerdings nicht wirklich, wie ich die Verbindung zwischen ioBroker, FHEM und dem Node testen kann, bzw. welche Werte ich im ioBroker für welches Objekt eintragen muss.
Gruß,
-
Funktionstest direkt am NodeMCU per Browser:
z.B der Kitt Effekt http://ip/control?cmd=nfx%20kitt%2000f00%2050
Dann sollte der Kitt Effekt starten.
Über FHEM:

Über ioBroker:
in den FHEM Objekten findest du ebenfalls ein nfx objekt mit dem kannst du die effekte aktivieren.
z.B wieder````
Kitt kitt 00ff00 50Kitt ist der Effekt. Welche Effekte es gibt siehe Firmware Readme. 00ff00 ist die Farbe 50 ist die Geschwindigkeit Andere Effekte benötigen auch andere Werte da musst du nachlesen Eine Farbe leuchten lassen wäre nfx rgb 00ff00 nfx dim 20 dimmt auf 20 hoffe das ist verständlich. -
definitiv der D4 / GPIO 2 ich nutze aber einen Wemos D1
Die erste LED sollte beim booten was machen.
Ist der Dim Wert ggf auf 0?
Hast du dem Stripe eine gute Stromversorgung gegeben?
Pass auf wenn du einen kompletten Stripe dran machst zieht der auf höher Lichtstärke übel strom.
Die LED Anzahl in der Weboberfläche eingegeben?
Probier mal einen anderen Effekt
z.B:
ip/control?cmd=nfx rainbow
-
Hallo,
Nachdem mir Alex in einem anderen Thread als blutiger Anfänger zu Hilfe kam, warte ich sehnsüchtig auf die Einbringung in VIS. Ist da jemand schon weiter gekommen?
MfG
-
Was genau möchtest du in VIS haben.
Es ist etwas schwierig mit den ganzen Effekten. Dann noch Dim Fade usw…
Das würde tausende Buttons werden.
Also wenn du einen Effekt hast den du gerne als Button haben magst können wir uns dran setzen mal was zu entwickeln.
ON / OFF als Button und ggf eine Liste mit Effekten als dropdown menü. Dann noch eine Schieber für Helligkeit/Geschwindigkeit/Fade?
-
ON / OFF als Button und ggf eine Liste mit Effekten als dropdown menü. Dann noch eine Schieber für Helligkeit/Geschwindigkeit/Fade? `
Also so ähnlich habe ich mir das Vorgestellt. Ich hätte die Vorstellung, einen Ein/Aus Knopf zu tätigen, Vordergrund und
Hintergrundfarbe einzustellen (vielleicht über colorpicker?) und Schieberegler für Dim, Fade und Speed.
Die meisten Effekte verwenden doch bestimmt die selben Variablen, oder denke ich falsch?
Vielen Dank im Vorraus
-
Das kommt immer auf den effekt an.
Ich bin auch kein Programmierprofi.
Wenn du mir erstmal einen Effekt sagst kann ich es mal testen.
-
Ziel ist es, dass das LED Band als Deckenbeleuchtung dienen soll. Deshalb wäre mir erstmal wichtig, dass das Band auch als Beleuchtung dienen kann (deshalb auch die RGBW Variante). Wenn das Band über die VIS ein und ausgeschaltet werden könnte und die Farben gesteuert werden könnte, wäre ich Happy. Vielleicht könntest du ja den Twinkle Effekt im Dropdown mit einbinden. Wenn das funktioniert traue ich mir das weite Einbinden vielleicht auch zu :-)
-
ich werde mal schauen ob ich am we zeit finde. mein iobroker muss erstmal wieder laufen :lol: und den controller muss ich wieder zusammenbauen.
-
Halli Hallo Ihr Tüftler,
irgendwie ist hier fast genau das Thema was ich schon eine weile suche. Bei mir sollte es nach möglichkeit ohne FHEM klappen. Meine Hardware ist ein Wemos D1 Mini und die WS2812 led. Mein Aktueller codd ist dieser hier :
! ````
/**********************************************************************************
Code for controlling RGB Strip using Amazon Echo and NodeMCU
Written by Sid for Sid's E Classroom
https://www.youtube.com/c/SidsEClassroom
************************************************************/
#include <arduino.h>
#include <esp8266wifi.h>
#include "fauxmoESP.h"
#include <adafruit_neopixel.h>
! #define WIFI_SSID ""//Set your Wifi name
#define WIFI_PASS ""//Set your Wifi Password
#define SERIAL_BAUDRATE 115200
! fauxmoESP fauxmo;
//declare switching pins
#define RGBCTL D7 //Change pins according to your NodeMCU/ESP pinouts
! int numPixels = 41;
int i;
//-----------------------------------------------------------------------------------------------
//Pixel initialization for Google's Colours
//Divide the total number of pixels in the stip by 4 and set pixel increments starting from zero
//If num of Pixels is not perfectly divisible by 4, consider the nearest multiple of 4
//eg: 28 in case of 29,30 and 31 pixels, 32 in case of 33,34 and 35 pixels.
//-----------------------------------------------------------------------------------------------
int start1 = 0;
int start2 = 3;
int start3 = 6;
int start4 = 9;
! // Parameter 1 = number of pixels in strip
// Parameter 2 = Arduino pin number (most are valid)
// Parameter 3 = pixel type flags, add together as needed:
// NEO_KHZ800 800 KHz bitstream (most NeoPixel products w/WS2812 LEDs)
// NEO_KHZ400 400 KHz (classic 'v1' (not v2) FLORA pixels, WS2811 drivers)
// NEO_GRB Pixels are wired for GRB bitstream (most NeoPixel products)
// NEO_RGB Pixels are wired for RGB bitstream (v1 FLORA pixels, not v2)
// NEO_RGBW Pixels are wired for RGBW bitstream (NeoPixel RGBW products)
Adafruit_NeoPixel strip = Adafruit_NeoPixel(numPixels, RGBCTL,NEO_RGB + NEO_KHZ800);
// -----------------------------------------------------------------------------
// Wifi Setup
// -----------------------------------------------------------------------------
! void wifiSetup() {
! // Set WIFI module to STA mode
WiFi.mode(WIFI_STA);
! // Connect
Serial.printf("[WIFI] Connecting to %s ", WIFI_SSID);
WiFi.begin(WIFI_SSID, WIFI_PASS);
! // Wait
while (WiFi.status() != WL_CONNECTED) {
Serial.print(".");
delay(100);
}
Serial.println();
! // Connected!
Serial.printf("[WIFI] STATION Mode, SSID: %s, IP address: %s\n", WiFi.SSID().c_str(), WiFi.localIP().toString().c_str());
Serial.println("Nach der Verbindung mit %s, sag Alexa 'Schalte <devicename> An' oder 'Aus'");
}
// -----------------------------------------------------------------------------
// Device callback and printing response in serial monitor
// -----------------------------------------------------------------------------
void callback(uint8_t device_id, const char * device_name, bool state) {
Serial.print("Device "); Serial.print(device_name);
Serial.print(" state: ");
if (state) {
Serial.println("ON");
} else {
Serial.println("OFF");
}
//------------------------------------------------------------------------------
//Switching action on detection of device name
//------------------------------------------------------------------------------
! //Turns strip RED
if ( (strcmp(device_name, "Rot") == 0) ) {
if (state) {
i = 1;
}
else {
allOff();
i = 0;
}
}
//Turns strip GREEN
if ( (strcmp(device_name, "Grün") == 0) ) {
if (state) {
i = 2;
}
else {
allOff();
i = 0;
}
}
//Turns strip BLUE
if ( (strcmp(device_name, "Blau") == 0) ) {
if (state) {
i = 3;
}
else {
allOff();
i = 0;
}
}
//RAINBOW pattern on the strip
if ( (strcmp(device_name, "Regenbogen") == 0) ) {
if (state) {
i = 8;
}
else {
allOff();
i = 0;
}
}
//Turns strip WHITE
if ( (strcmp(device_name, "STRIPE") == 0) ) {
if (state) {
i = 4;
}
else {
allOff();
i = 0;
}
}
//Turns strip into Google's colours
if ( (strcmp(device_name, "GOOGLE LIGHTS") == 0) ) {
if (state) {
i = 9;
}
else {
allOff();
i = 0;
}
}
//Turns strip into Pink colours
if ( (strcmp(device_name, "Pink") == 0) ) {
if (state) {
i = 11;
}
else {
allOff();
i = 0;
}
}
//Turns strip into Pink colours
if ( (strcmp(device_name, "Violet") == 0) ) {
if (state) {
i = 12;
}
else {
allOff();
i = 0;
}
}
//Turns strip into Pink colours
if ( (strcmp(device_name, "50") == 0) ) {
if (state) {
i = 13;
}
else {
allOff();
i = 0;
}
}
}
! void setup() {
//Initialize pins to Low on device start
pinMode(RGBCTL, OUTPUT);
digitalWrite(RGBCTL, LOW);
! // Init serial port and clean garbage
Serial.begin(SERIAL_BAUDRATE);
Serial.println("FauxMo demo sketch");! // Wifi
wifiSetup();
! // Device Names for RGB Patternsi = 0;
fauxmo.addDevice("Rot");
fauxmo.addDevice("Grün");
fauxmo.addDevice("Blau");
fauxmo.addDevice("Regenbogen");
fauxmo.addDevice("STRIPE");
fauxmo.addDevice("GOOGLE LIGHTS");
fauxmo.addDevice("Pink");
fauxmo.addDevice("Violet");
fauxmo.addDevice("50");
fauxmo.onMessage(callback);strip.begin();
strip.show();
strip.setBrightness(100);! }
! void loop() {
fauxmo.handle();
startShow(i);
}
! //Case for strip patterns. Add a new case or pattern if you wish
void startShow(int i) {
switch (i) {
case 0: colorWipe(strip.Color(0, 0, 0), 50); // Black/Off
break;
case 1: colorWipe(strip.Color(255, 0, 0), 50); // Red
break;
case 2: colorWipe(strip.Color(0, 255, 0), 50); // Green
break;
case 3: colorWipe(strip.Color(0, 0, 255), 50); // Blue
break;
case 4: colorWipe(strip.Color(255, 255, 255), 20); // White
break;
case 5: theaterChase(strip.Color(127, 127, 127), 50); // White Chase
break;
case 6: theaterChase(strip.Color(127, 0, 0), 50); // Red Chase
break;
case 7: theaterChase(strip.Color( 0, 0, 127), 50); // Blue Chase
break;
case 8: rainbow(20);
break;
case 9: google();
break;
case 10: theaterChaseRainbow(50);
break;
case 11: colorWipe(strip.Color( 199, 21, 133), 50); // Pink
break;
case 12: colorWipe(strip.Color( 255, 0, 255), 50); // Violett
break;
case 13: strip.setBrightness(50); // Violett
break;
}
}
! // Fill the dots one after the other with a color
void colorWipe(uint32_t c, uint8_t wait) {
for (uint16_t i = 0; i < strip.numPixels(); i++) {
strip.setPixelColor(i, c);
strip.show();
delay(wait);
}
}
//Rainbow pattern
void rainbow(uint8_t wait) {
uint16_t i, j;
! for (j = 0; j < 256; j++) {
for (i = 0; i < strip.numPixels(); i++) {
strip.setPixelColor(i, Wheel((i + j) & 255));
}
strip.show();
delay(wait);
}
}
//Rainbow equally distributed throughout
void rainbowCycle(uint8_t wait) {
uint16_t i, j;
! for (j = 0; j < 256 * 5; j++) { // 5 cycles of all colors on wheel
for (i = 0; i < strip.numPixels(); i++) {
strip.setPixelColor(i, Wheel(((i * 256 / strip.numPixels()) + j) & 255));
}
strip.show();
delay(wait);
}
}
//Theatre-style crawling lights
void theaterChase(uint32_t c, uint8_t wait) {
for (int j = 0; j < 10; j++) { //do 10 cycles of chasing
for (int q = 0; q < 3; q++) {
for (int i = 0; i < strip.numPixels(); i = i + 3) {
strip.setPixelColor(i + q, c); //turn every third pixel on
}
strip.show();
! delay(wait);
! for (int i = 0; i < strip.numPixels(); i = i + 3) {
strip.setPixelColor(i + q, 0); //turn every third pixel off
}
}
}
}
//Theatre-style crawling lights with rainbow effect
void theaterChaseRainbow(uint8_t wait) {
for (int j = 0; j < 256; j++) { // cycle all 256 colors in the wheel
for (int q = 0; q < 3; q++) {
for (int i = 0; i < strip.numPixels(); i = i + 3) {
strip.setPixelColor(i + q, Wheel( (i + j) % 255)); //turn every third pixel on
}
strip.show();
! delay(wait);
! for (int i = 0; i < strip.numPixels(); i = i + 3) {
strip.setPixelColor(i + q, 0); //turn every third pixel off
}
}
}
}
//Fill strip with Google's Colour
void google() {
//Set initial couple of pixels to match Google Blue
for ( int i = 0; i < 0 + 10; i++ ) {
strip.setPixelColor(i, 66, 133, 244 );
}
//Set initial couple of pixels to match Google Red
// next 3 pixels = color set #2
for ( int i = 10; i < 10 + 10 ; i++ ) {
strip.setPixelColor(i, 234, 67, 53 );
}
//Set initial couple of pixels to match Google Orange
// next 3 pixels = color set #3
for ( int i = 20; i < 20 + 10; i++ ) {
strip.setPixelColor(i, 251, 188, 5 );
}
//Set initial couple of pixels to match Google Green
// last 3 pixels = color set #3
for ( int i = 30; i < 30 + 10; i++ ) {
strip.setPixelColor(i, 52, 168, 83 );
}
! strip.show();
}
//Turns all pixels OFF
void allOff() {
for ( int i = 0; i < numPixels; i++ ) {
strip.setPixelColor(i, 0, 0, 0 );
}
strip.show();
}
! // Input a value 0 to 255 to get a color value.
// The colours are a transition r - g - b - back to r.
uint32_t Wheel(byte WheelPos) {
WheelPos = 255 - WheelPos;
if (WheelPos < 85) {
return strip.Color(255 - WheelPos * 3, 0, WheelPos * 3);
}
if (WheelPos < 170) {
WheelPos -= 85;
return strip.Color(0, WheelPos * 3, 255 - WheelPos * 3);
}
WheelPos -= 170;
return strip.Color(WheelPos * 3, 255 - WheelPos * 3, 0);
}</devicename></adafruit_neopixel.h></esp8266wifi.h></arduino.h>Momentane Funktion ist das ich über ALEXA das Steuern kann. Mein Wunsch ist das ich das über iObroker visuell steuern kann. Mein Gedanke dazu war das man eventuell dazu nur den Sketch mit den nötigen Mqtt sachen befüllen müsste oder???? würde es dann klappen???? was meint Ihr???? -
on off dim speed gehen ohne probleme.
Den Effekt mag er noch nicht so nehmen wie ich das mag. Es ist aber spät und mache heute nix mehr 8-)
Hey! Du scheinst an dieser Unterhaltung interessiert zu sein, hast aber noch kein Konto.
Hast du es satt, bei jedem Besuch durch die gleichen Beiträge zu scrollen? Wenn du dich für ein Konto anmeldest, kommst du immer genau dorthin zurück, wo du zuvor warst, und kannst dich über neue Antworten benachrichtigen lassen (entweder per E-Mail oder Push-Benachrichtigung). Du kannst auch Lesezeichen speichern und Beiträge positiv bewerten, um anderen Community-Mitgliedern deine Wertschätzung zu zeigen.
Mit deinem Input könnte dieser Beitrag noch besser werden 💗
Registrieren AnmeldenSupport us
238
Online33.0k
Benutzer83.5k
Themen1.3m
Beiträge