

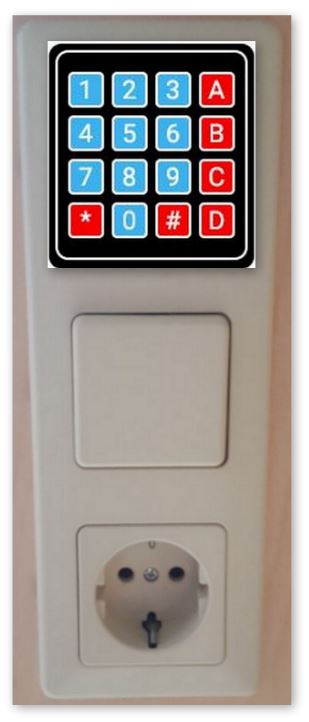
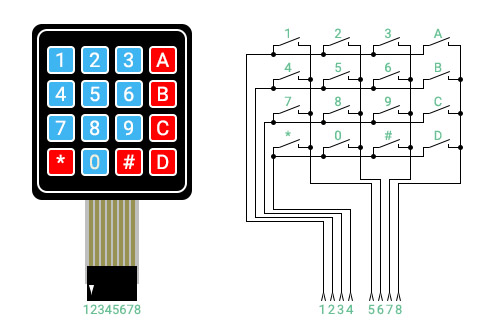
Key Matrix

-
Hallo Leute,
Ich habe mal eine Kleine Aufgabe für die Schlauen Leute hier unter Euch. Ich möchte gern meine Vorhandenen Key Pads weiterhin nutzbar machen Bis gestern hatte ich SHC im Einsatz bin aber nun Voll und ganz auf IoBroker umgestiegen bin damit auch vollständig zufrieden. Aber ich bekomme leider keine Möglichkeit per http.GET der von Esp12 gesendet wird keine Möglichkeit das IoBroker dieses auch versteht. Könnte mir da einer mal einen tipp geben Ich würde am Liebsten für jede taste einen Neuen Objekt anlegen damit ich nicht jedesmal die taste neu um Programmieren müsste wenn sich ein Gerät ändern sonder es einfach so umsetzen:
taste 1 wird gedruckt -> esp12 sendet Code ?Geraete=1&taste=1 -> Iobroker merkt das die taste gerät Licht Zugeordnet ist und schaltet es Aus bzw Ein Je nach zustand…
das ganze abfragen und co bekomm ich über javascript hin aber das Problem wäre halt der Empfang des Befehl
Liebe grüße Jannek
Hier mein Quellcode für den ESP12 den ich im Einsatz habe.
! ````
#include <arduino.h>
#include <esp8266wifi.h>
#include <esp8266wifimulti.h>
#include <esp8266httpclient.h>
#define USE_SERIAL Serial
//==========================KeyPad-SETTINGS=============================
#include <keypad.h>
const byte ROWS = 4; //four rows
const byte COLS = 4; //four columns
//define the cymbols on the buttons of the keypads
char keys[ROWS][COLS] = {
{'D','#','0',''},
{'C','9','8','7'},
{'B','6','5','4'},
{'A','3','2','1'}
};
byte rowPins[ROWS] = {2, 0, 4, 5}; //connect to the row pinouts of the keypad
byte colPins[COLS] = {15, 13, 12, 14}; //connect to the column pinouts of the keypad
// Create the Keypad
Keypad kpd = Keypad( makeKeymap(keys), rowPins, colPins, ROWS, COLS );
//===========================WIFI-SETTINGS==============================
IPAddress ip(192, 168, 178, 77);
const char ssid = "SSID";
const char* password = "PASSWORD";
ESP8266WiFiMulti WiFiMulti;
HTTPClient http;
//===============================SETUP==================================
void setup() {
Serial.begin(9600);
delay(10);
// We start by connecting to a WiFi network
Serial.println();
Serial.println();
Serial.print("Connecting to ");
Serial.println(ssid);
WiFi.begin(ssid, password);
while (WiFi.status() != WL_CONNECTED) {
delay(500);
Serial.print(".");
}
Serial.println("");
Serial.println("WiFi connected");
Serial.println("IP address: ");
Serial.println(WiFi.localIP());
Serial.flush();
delay(200);
// allow reuse (if server supports it)
http.setReuse(true);
}
void loop()
{
keypadin();
}
void keypadin()
{
char key = kpd.getKey();
if(key) // Check for a valid key.
{
switch (key)
{
case '1':
Serial.println(key);
//===============================http senden==========Wandboard================
if((WiFiMulti.run() == WL_CONNECTED)) {
http.begin("http://192.168.178.22/shc/index.php?app=shc&a&ajax=executeswitchcommand&sid=48&command=2");
int httpCode = http.GET();
http.end();
}
//===============================http senden===================================
break;
case '2':
Serial.println(key);
//===============================http senden===================================
if((WiFiMulti.run() == WL_CONNECTED)) {
http.begin("http://192.168.178.22/shc/index.php?app=shc&a&ajax=executeswitchcommand&sid=10&command=2");
int httpCode = http.GET();
http.end();
}
//===============================http senden===========GoldeneRose=============
break;
default:
Serial.println(key);
}
}
}</keypad.h></esp8266httpclient.h></esp8266wifimulti.h></esp8266wifi.h></arduino.h>[6191_bildschirmfoto_2017-03-26_um_21.31.09__1_.png](/assets/uploads/files/6191_bildschirmfoto_2017-03-26_um_21.31.09__1_.png) [6191_88ba8ff482c7b2b57066bc782da416d1.jpg](/assets/uploads/files/6191_88ba8ff482c7b2b57066bc782da416d1.jpg) [6191_unbenannt4.jpg](/assets/uploads/files/6191_unbenannt4.jpg) [6191_wohnungs_plan.jpg](/assets/uploads/files/6191_wohnungs_plan.jpg) -
Moin :D
schau mal hier : viewtopic.php?f=34&t=7756
Ist zwar für den ESP8266, aber als Grundlage kannst du damit starten.
Damit das ganze nicht verzögert während der Eingabe der einzelnen Tasten würde ich mir die Tastenkombination im ESP zwischenspeichern und erst senden, wenn alles eingegeben ist. SetBulk nennt sich das Kommando….
Vielleicht hilft es dir ein wenig weiter bei der Umsetzung
Grüße
Tom
-
Moin :D
schau mal hier : viewtopic.php?f=34&t=7756
Ist zwar für den ESP8266, aber als Grundlage kannst du damit starten.
Damit das ganze nicht verzögert während der Eingabe der einzelnen Tasten würde ich mir die Tastenkombination im ESP zwischenspeichern und erst senden, wenn alles eingegeben ist. SetBulk nennt sich das Kommando….
Vielleicht hilft es dir ein wenig weiter bei der Umsetzung
Grüße
Tom `
WOW genau das habe ich gesucht danke den kann ich das heute fertig machen und bin mehr als Glücklich… den nur noch die VIs anpassen und schon ist es schick..
Hey! Du scheinst an dieser Unterhaltung interessiert zu sein, hast aber noch kein Konto.
Hast du es satt, bei jedem Besuch durch die gleichen Beiträge zu scrollen? Wenn du dich für ein Konto anmeldest, kommst du immer genau dorthin zurück, wo du zuvor warst, und kannst dich über neue Antworten benachrichtigen lassen (entweder per E-Mail oder Push-Benachrichtigung). Du kannst auch Lesezeichen speichern und Beiträge positiv bewerten, um anderen Community-Mitgliedern deine Wertschätzung zu zeigen.
Mit deinem Input könnte dieser Beitrag noch besser werden 💗
Registrieren AnmeldenSupport us
320
Online33.0k
Benutzer83.5k
Themen1.3m
Beiträge